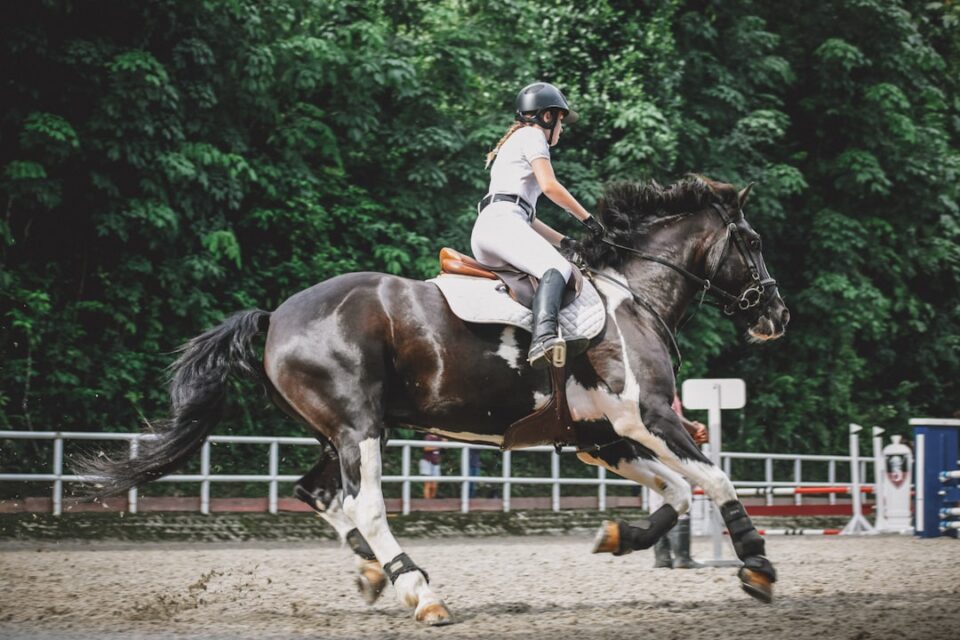
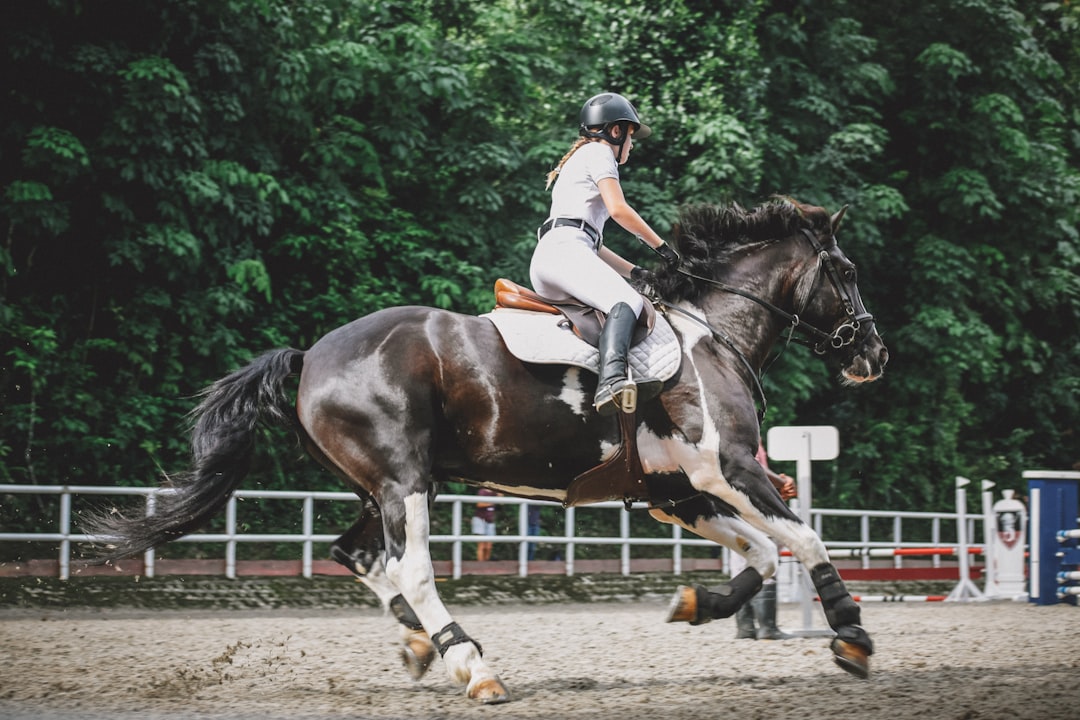
This guide uses beginner horse riding tips as the starting point for the practical advice below. Beginner horse riding tips are most useful when they turn a nervous first lesson into a series of small, manageable decisions. Riding is not about pulling harder, sitting perfectly, or asking a horse to move through fear. It is a partnership built on clear signals, balanced posture, patient timing, and respect for the animal in front of you. This guide explains how to prepare, what to expect at the stable, how to mount and steer, how to handle common surprises, and how to build a sensible riding routine.
Every horse, instructor, and facility is different. Use this article as general preparation, then follow the directions of a qualified instructor who knows the horse and the local riding conditions. A good lesson should feel structured rather than rushed. You should understand where to stand, how to lead, when to ask questions, and what to do if you become uncertain.
beginner horse riding tips: Beginner horse riding tips start before you reach the stable
Your first ride begins with planning. Choose a reputable riding school that offers supervised lessons for beginners rather than an informal trail ride with little instruction. Ask how lessons are structured, how many riders share the arena, what kind of horses are used, and whether a certified or experienced instructor remains present throughout the session. A quiet, well-schooled horse is usually a better learning partner than an energetic horse selected simply because it looks impressive.
Tell the stable about your experience, height, approximate weight, allergies, and any mobility concerns before booking. This information helps staff select suitable equipment and a horse. It also gives the instructor a chance to adjust the lesson. You are not being difficult by sharing limits. Clear information helps everyone make better choices.
Plan to arrive early. Ten to twenty minutes gives you time to find the office, sign forms, use the restroom, collect a helmet, and listen to the stable rules without feeling hurried. Late arrivals often miss the safety briefing and begin the lesson already tense. Put your phone away during the session unless the instructor permits photos. A moving horse, a lead rope, and a distracted rider create an unnecessary combination.
Wear long trousers that allow your knees to bend. Jeans can work if they do not have bulky inside seams, although riding tights or breeches are more comfortable for regular lessons. Choose a fitted shirt or light layers that will not catch on branches, tack, or gates. Avoid scarves, loose cords, dangling jewelry, and slick jackets. Wear closed-toe shoes with a small, defined heel. Trainers with flat soles can slide through a stirrup, while wide hiking boots may become difficult to remove.
Bring water, sunscreen, weather protection, and a small snack for longer sessions. Outdoor riding exposes you to sun and wind even when the temperature feels mild. Do not arrive impaired, exhausted, or dehydrated. The goal is to notice the horse and follow instructions clearly.
What to expect during a first lesson
A beginner lesson often has several stages. You may meet the horse in a stall or paddock, learn how to approach, observe grooming, help prepare the tack, walk to the arena, mount with assistance, practice steering and stopping at a walk, and finish by dismounting and helping return the horse. The order varies, but the pattern is useful because each stage teaches a different part of the partnership.
The instructor may ask you to stand near the horse’s shoulder rather than directly in front of its face or behind its hind legs. Horses have blind spots and can react quickly to unexpected movement. Speak softly as you approach so the horse knows where you are. Let the horse sniff your hand if the instructor suggests it, but do not push your hand toward the nose or feed treats without permission.
Listen for stable-specific rules. Some barns require riders to walk horses on the left side, tie them only in designated places, keep a set distance in the arena, or call out before passing. These rules are not decoration. They help riders and horses share a limited space without surprises.
Expect the horse to move, breathe heavily, swish its tail, shift its feet, or look toward a noise. These behaviors do not automatically signal a problem. Your instructor can explain what is ordinary for that horse and what needs attention. New riders often freeze when a horse turns its head or lifts a foot. A calm voice and a clear question are more useful than guessing.
Do not measure the lesson by how long you remain in the saddle. A session that includes careful grooming, correct mounting, and a few balanced steps can be more productive than a long ride filled with confusion. The first goal is not speed. It is learning to stay observant and communicate without unnecessary force.
Choosing and checking a riding helmet
A properly fitted equestrian helmet is one of the most important pieces of riding equipment. Use a helmet designed and certified for equestrian activities, not a bicycle, climbing, cycling, or casual sports helmet. Ask the stable which current safety standard it requires. If you buy your own helmet, follow the manufacturer’s fitting instructions and replace it after a significant impact, even if the outside appears undamaged.
The helmet should sit level on your head, low enough at the forehead to feel secure without blocking your view. It should not rock when you gently move your head. Fasten the chin strap so it is snug but comfortable, with enough room for normal breathing and swallowing. A helmet that is too loose can shift at the moment you need it most. A helmet that is too tight may distract you throughout the lesson.
Do not borrow a helmet without checking its condition and fit. Shared helmets can be practical at a lesson barn, but the instructor or staff member should adjust it for you. Look for cracked shells, damaged straps, missing padding, or a distorted shape. Do not decorate or modify a helmet in a way that interferes with its structure, ventilation, or fitting system.
Helmets do not replace good habits. Ride in an enclosed area when learning, keep appropriate space between horses, and follow the instructor’s direction. Avoid mounting near a loose gate, a busy road, or a group of unfamiliar horses. Equipment supports good decisions; it cannot compensate for poor supervision.
Consider wearing a safety vest for activities with a higher chance of a fall, such as jumping or riding on uneven terrain, once your instructor recommends that activity. Ask how it should fit and whether it allows you to move comfortably. Beginners should focus on a stable foundation before adding speed, obstacles, or challenging routes.
How to approach, groom, and lead a horse
Approach from the side where the horse can see you, usually near the shoulder. Walk at a steady pace and speak quietly. Sudden running, waving, or approaching from directly behind can startle a horse. If a horse turns away, pins its ears, stamps, or becomes tense, stop and ask the instructor what to do. Do not interpret warning signals as a personal insult, and do not insist on touching a horse that appears uncomfortable.
Grooming teaches you to notice the horse’s body and mood before riding. A curry comb loosens dirt on appropriate areas, while a softer brush removes dust from sensitive places. Your instructor will show you which tools to use on the face, legs, belly, and back. Use gentle pressure and keep one hand on the horse when working around its hindquarters if the instructor recommends it, so the horse knows where you are.
Pick up a hoof only after being shown how. Stand beside the leg, keep your feet clear, and support the hoof rather than pulling it toward you. Horses can shift their weight without warning. If the horse resists, put the hoof down and ask for help. A first-time rider should not wrestle with a foot, a bridle, or a frightened animal.
When leading, hold the rope a short distance below the clip and keep the extra rope folded safely in your hand. Never wrap a lead rope around your hand, wrist, or body. Walk beside the horse’s shoulder, not far ahead and not directly behind. If the horse stops, turn, or moves into your space, release tension and ask the instructor how to reposition yourself. Do not coil excess rope around yourself to look tidy.
Grooming and leading are not chores separate from riding. They teach timing, personal space, and attention. You learn that the horse notices pressure, movement, voice, and body position. Those same ideas will matter when you hold the reins and ask for a turn.
Finding a balanced position in the saddle
Once mounted, your first task is to find a position that allows you to follow the horse’s movement. Sit near the center of the saddle with your weight distributed through both seat bones. Keep your shoulders relaxed and your chest open without pushing your ribs forward. Look between the horse’s ears or toward the direction of travel instead of staring down at the ground.
Your hips and knees should remain flexible. Let your legs hang naturally rather than gripping with your knees. A tight knee can push your lower leg away from the horse and make your balance less stable. Keep your heels slightly lower than your toes, but do not force them down so hard that your ankles become rigid. Think of your lower leg as a quiet line from hip to heel.
Your hands should be carried in front of the saddle with soft elbows. Keep the reins even unless your instructor gives a specific correction. Avoid leaning back when you want to stop and avoid leaning forward when the horse moves. Instead, close your fingers gently, sit tall, and use the amount of rein and voice your instructor describes. Large movements often confuse a horse and make it harder for you to notice what worked.
Balance comes from alignment, not from holding the reins. Imagine your ear, shoulder, hip, and heel forming a loose vertical line. This is a useful picture, not a rigid pose. Every horse has a different stride, and every rider has a different build. The instructor may adjust your stirrup length, hand position, or seat to suit the horse and the exercise.
Check your body every few minutes. Are your shoulders near your ears? Are your fingers clamped? Are you holding your breath? Can you turn your head without losing balance? Relax one area at a time. A quiet rider gives the horse fewer accidental signals.
Using reins, legs, and voice together
Riding aids are the signals you use to communicate. They include your seat, legs, hands, and voice. Beginners often focus on the reins because they are visible, but steering and slowing should not come from pulling continuously. Your instructor will show you how to combine aids in a sequence that suits the horse.
To ask for forward movement, you may use a gentle leg cue while keeping your body balanced. If the horse does not respond, do not immediately kick harder or wave the reins. Check whether your leg is in the correct place, whether you released after the horse responded, and whether the horse understood the request. Ask the instructor to watch. Good communication uses a clear signal followed by a release of pressure when the horse gives the desired response.
To slow down, sit deeper, soften your body, close your fingers briefly, and use your voice if taught. Keep your hands steady rather than pulling backward for several seconds. A horse may need a moment to respond. If you keep adding pressure without a pause, the horse may become dull to the signal or tense through its neck.
For a turn, look where you want to go, open the inside rein slightly, support with the outside rein, and guide with your legs as instructed. The exact technique depends on your instructor’s method and the horse’s training. Do not twist your shoulders while your hips face another direction. Turn your eyes and upper body first, then allow the rest of your position to follow.
Your voice can reinforce a request, especially when stopping, calming, or rewarding. Use a normal, clear tone. Horses learn from consistency. A long stream of nervous talking can make it harder to distinguish a deliberate cue from background noise.
Release is part of every effective aid. If you ask for a halt and the horse stops, soften your fingers. If you ask for a turn and the horse follows the path, allow the reins to remain comfortable. The release tells the horse which response was correct and gives both of you a moment to reset.
Steering, stopping, and arena awareness
Learn the arena layout before you begin. Identify the entrance, corners, center line, fence, mounting area, and any spots where people or equipment may appear. Keep your eyes ahead, especially when other horses are present. A horse follows the line you choose, so staring at an obstacle can accidentally direct you toward it.
At a walk, practice large changes of direction before attempting tight circles. A wide turn gives you time to coordinate your eyes, shoulders, hands, and legs. If you feel lost, return to a straight line and ask for help. Correcting a small mistake early is easier than trying to recover after drifting across the arena.
Stopping should be planned rather than sudden. Choose a safe location, look ahead, sit tall, and use the taught halt cue. Keep a safe distance from the horse in front of you. Many riding schools use a horse-length or more of space, but the exact distance depends on the horses, the arena, and the instructor. Do not ride directly behind another horse’s hind legs.
When passing, listen to the arena rules. Some schools ask the rider on the inside track to pass, while others use a specific call such as inside or track. Announce your intention clearly and give other riders time to respond. Do not squeeze between horses, the wall, and a gate. If you are unsure who has priority, slow down and ask.
Stay aware of the horse’s speed and path, not just your own position. A horse may become anxious when another horse approaches quickly, leaves the arena, or moves behind it. Tell the instructor before the problem becomes large. You can circle, halt, or move to a quieter area if directed. Awareness is a practical skill that improves with every lesson.
Handling nerves and unexpected movement
Feeling nervous is normal. The goal is not to pretend you are fearless. Tell your instructor how you feel before mounting and speak up if the pace or exercise becomes too difficult. A competent instructor can shorten the lesson, choose a quieter horse, put you on a lunge line, or return to a basic exercise.
When you become tense, breathe out slowly and check your hands, shoulders, and legs. New riders often grip with their knees and pull on the reins when frightened. That reaction can make the horse tense as well. Sit as evenly as you can, look toward the instructor, and follow one instruction at a time. You do not need to solve the entire situation in your head.
If the horse stops, do not repeatedly kick without guidance. Check whether it is looking at something, confused by the cue, uncomfortable in the tack, or simply waiting for clearer communication. If the horse speeds up, avoid leaning forward and pulling sharply. Sit tall, keep your hands steady, and use the instructor’s slowing instructions. If the horse spooks, allow your body to follow the movement while keeping your eyes up and your hands controlled.
If you lose a stirrup, do not chase it with your foot while the horse is moving. Regain balance, return to a walk if directed, and ask for help. If a rein slips, tell the instructor rather than grabbing suddenly. If you feel you may fall, prioritize moving away from hard obstacles and follow the stable’s emergency instructions. In a lesson environment, the instructor may be able to bring the horse to a halt quickly.
After an unsettling moment, take a pause. Discuss what happened without blaming yourself or the horse. A useful review identifies the trigger, the rider’s response, the horse’s response, and one adjustment for next time. Confidence grows from understanding events, not from forcing yourself to ignore them.
Mounting, dismounting, and ground safety
Mount only in the place and manner your instructor specifies. Check that the girth is secure, the reins are organized, and the horse is standing quietly. Keep your left hand on the reins and mane as instructed, place your foot carefully in the stirrup, and rise smoothly rather than jumping onto the saddle. A mounting block reduces strain on the saddle and makes the process easier for many riders.
Do not mount while the horse is walking away, near a busy doorway, or beside another horse that is unsettled. Ask someone to hold the horse if that is the stable’s procedure. Once seated, wait for the instructor’s signal before moving off. Keep your feet in the stirrups and check your balance before beginning an exercise.
For dismounting, bring the horse to a complete halt. Remove both feet from the stirrups if instructed, lean slightly forward, swing one leg clear without kicking the horse, and land softly. The exact method may vary, especially for riders with limited mobility. Follow the instructor’s demonstration rather than copying a random video.
After dismounting, keep hold of the reins or lead rope as directed. Do not let the reins drag on the ground. Walk beside the shoulder and stay alert near doorways, other horses, and equipment. Remove tack only in the designated area. A horse can become impatient after a lesson, and the safest routine is usually the most predictable one.
Wash your hands after handling horses, tack, and grooming tools. Check your shoes, clothing, and skin for loose mud or irritation before leaving. If you were riding outdoors, inspect yourself for ticks or scratches according to local guidance. Simple aftercare keeps the stable visit comfortable and helps you notice small equipment or clothing problems before the next session.
Progressing from walking to more advanced skills
Most beginners benefit from spending several lessons at the walk. Walking allows you to practice steering, halting, figures, transitions, position, and arena etiquette without adding too much movement. A calm walk is not a lesser skill. It is the foundation for every faster gait and many later activities.
Before trotting, you should be able to mount and dismount calmly, stop with control, steer around the arena, keep a safe distance, and recover your balance after a small change in rhythm. Your instructor may introduce short periods of rising trot, where you move with the horse’s rhythm, or a sitting trot, where you remain seated. These skills require different coordination, and progress can feel uneven.
Do not compare your timeline with another rider’s. One person may have previous balance experience, while another may be learning how to move confidently for the first time. Height, flexibility, fitness, anxiety, the horse’s stride, and the instructor’s approach all affect progress. Ask for one clear goal per lesson, such as maintaining a straight line, halting at a marker, or keeping a relaxed lower leg.
Jumping, cantering, trail riding, and riding without stirrups should come after your instructor believes the basics are reliable. More advanced work adds speed, height, uneven footing, or greater responsibility. These activities can be enjoyable, but they require preparation rather than bravado. If you feel pressured to advance before you understand the exercise, say so.
Keep a short riding journal. Record the horse, the lesson focus, what felt comfortable, what confused you, and one question for next time. Notes help you see gradual progress that is easy to miss from week to week. They also help you notice patterns, such as losing balance when looking down or tightening your hands during transitions.
Building a practical riding routine
Consistency matters more than cramming. A weekly or fortnightly lesson gives your body and mind time to remember the basic position while keeping the experience manageable. If you can ride only occasionally, spend time between lessons reviewing stable vocabulary, watching demonstrations from reputable instructors, stretching gently, and thinking through the sequence of a safe lesson.
General fitness can support riding, especially balance, mobility, and core endurance, but you do not need to become an athlete before beginning. Walking, gentle strength work, and mobility exercises may make mounting and maintaining a relaxed position easier. Avoid exhausting yourself immediately before a lesson. Fatigue can affect attention and coordination.
Take care of your equipment. Clean boots after muddy sessions, allow damp clothing to dry, and inspect your helmet, gloves, and footwear. Store a helmet away from heat, sharp objects, and heavy items. Ask the stable how to clean borrowed tack and whether riders are expected to report damaged equipment. A small crack, loose buckle, or worn strap should be reported rather than ignored.
Keep a simple pre-ride checklist in your phone or notebook. It might include suitable clothing, helmet fit, closed-toe boots, water, weather conditions, arrival time, and questions for the instructor. Before mounting, add horse behavior, girth, reins, stirrups, arena traffic, and emergency instructions. Checklists are useful because excitement makes people forget ordinary details.
Review your goals every few weeks. You may begin wanting to ride a trail and later discover that you enjoy flatwork, grooming, horse care, or learning about training. There is no single correct reason to ride. A thoughtful rider keeps learning about horse behavior, tack, stable management, and personal responsibility alongside riding technique.
A beginner’s lesson-day checklist
Use this checklist before your next visit, then adapt it to the stable’s rules.
- Book a supervised beginner lesson with a reputable instructor.
- Arrive early enough for forms, equipment fitting, and the safety briefing.
- Wear flexible long trousers, a fitted top, and closed-toe boots with a small heel.
- Remove loose jewelry and secure long hair.
- Use an approved equestrian helmet that fits level and securely.
- Tell the instructor about your experience, concerns, and physical limitations.
- Approach the horse from the side and follow the stable’s handling instructions.
- Keep lead ropes and reins free of loops around your hands or body.
- Mount, move, and dismount only when the instructor gives permission.
- Look ahead, keep a safe distance, and follow arena traffic rules.
- Use small, clear aids and release pressure after the horse responds.
- Speak up if you feel confused, frightened, uncomfortable, or rushed.
- Clean up, return equipment correctly, and report damage or unusual behavior.
For related guidance, read the ride a horse section for more practical articles about preparation, equipment, stable manners, and riding skills.
Learning with patience and respect
Good riding is quiet work. It asks you to notice small changes, give clear signals, and adjust without taking frustration out on the horse. Some lessons will feel easy, while others may expose a habit you did not know you had. Both kinds of lessons are useful.
Remember that the horse is a living partner, not a vehicle or a test of courage. A horse may be tired, distracted, uncertain, sensitive, or uncomfortable. Your instructor and the stable team are there to interpret those signals and keep the session appropriate. Ask questions when you do not understand a behavior, and accept that sometimes the right decision is to pause, dismount, or end an exercise.
The most reliable progress comes from repetition, honest feedback, and careful attention to safety. Start with a suitable horse, learn the stable routine, build a balanced seat, and increase difficulty only when the basics feel dependable. With that approach, each lesson gives you more than time in the saddle. It gives you a better understanding of how rider, horse, equipment, and environment work together.