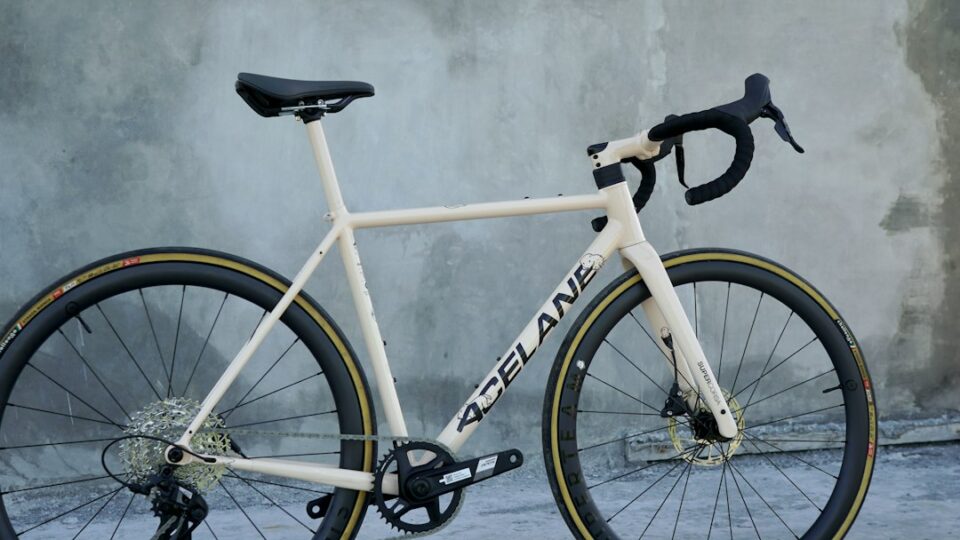
If you want one bike that can handle dirt, broken pavement, and long days without drama, getting your gravel bike setup right is the single best investment of time you can make. A thoughtful setup turns the same frame into a capable explorer on washboard fire roads, a steady commuter on chipseal, and a fast weekender across backcountry loops. This guide breaks down the decisions that matter most so you can build a confident, efficient, low‑hassle ride that suits your terrain and goals.
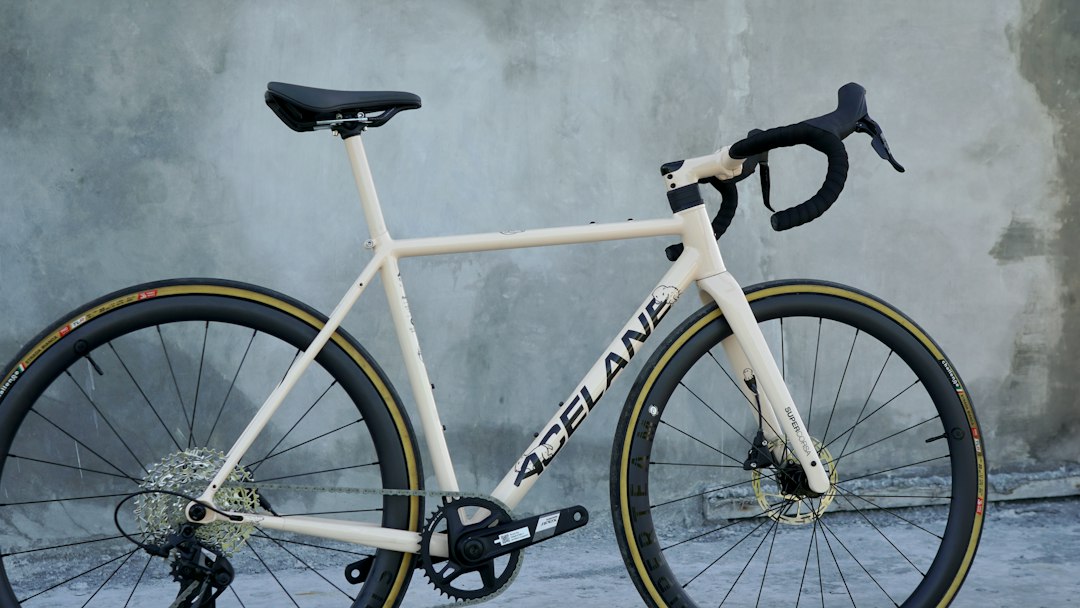
gravel bike setup: what it really means
People often think “gravel spec” is just fat tires and maybe a frame bag. In practice, it is a system. It includes the contact points that determine comfort, the drivetrain that decides cadence and traction, the cockpit that controls handling, the wheels and tires that shape grip and rolling resistance, and the small finishing touches that keep the ride smooth when conditions change.
Because gravel terrain varies wildly—from hardpack and caliche to loam, sand, and chunky river rock—the best setup is modular. You want a set of choices that you can adjust in minutes, not a single permanent build. That means the right tire widths and casing options, a drivetrain range that matches your climbs, a handlebar and lever position that keeps you planted when it gets rough, and bags that carry exactly what you need without rattling or tossing your balance off. Keep that system idea in mind, and most decisions become easier.
As you explore options, it helps to keep a few trustable references handy. For routes, elevation profiles, and seasonally relevant tips from other riders, the Cycling section on our site is a good starting point. Pair that with your local club’s knowledge, then use the frameworks here to dial your bike for the surface under your wheels this week—not last month.
Fit first: position, comfort, and control
Fit is the foundation. On gravel, tiny changes in reach, stack, and pressure distribution matter more because the surface keeps asking your body to stabilize. If you feel stretched, you will tense the upper back and load the hands. If you feel cramped, you will crowd the bars and reduce breathing room. Start with a neutral endurance position, then refine.
Practical targets many riders find helpful:
- Saddle height: Start with a road baseline (heel on pedal test or prior fit) and micro‑adjust in 2–3 mm steps. On rougher routes, a hair lower can help with traction when seated.
- Setback: Keep your knee tracking comfortably over the pedal spindle at your natural fore‑aft. If climbs are steep and traction limited, a touch more setback can stabilize seated efforts.
- Reach and stack: Aim for relaxed shoulders and slight bend in elbows while on the hoods. If your triceps lock out or your shoulders creep up, consider a shorter stem, more stack, or a bar with slight back‑sweep.
- Saddle choice: Pick a shape that supports your sit bones, not soft tissue. Gravel favors pressure relief channels and stable platforms; test both firm and lightly padded shells.
Signs you are close: you can ride 90 minutes on varied surfaces without numb hands, your lower back feels calm, and you can stand and remount the saddle smoothly without searching for the contact point. If those aren’t true yet, adjust one variable at a time and take notes immediately after each ride while sensations are fresh.
Frames, forks, and geometry for mixed terrain
Gravel frames are built around stability and tire clearance. Reach numbers tend to be moderate, front centers are a bit longer than road, and fork offsets are designed to create predictable trail values with 38–50 mm tires. You do not need the lowest, longest “mullet” geometry unless your routes are extremely rough or you ride singletrack frequently. For most riders, comfortable endurance geometry with enough stack and a wheelbase around 1020–1060 mm hits the sweet spot.
Look for:
- Tire clearance: Minimum 45 mm with room for mud; 50–53 mm opens options for deep sand or chunky rock.
- Mounts: Three‑pack mounts on forks and down tube, top‑tube boss for a bolt‑on bag, and fender mounts if you ride year‑round.
- Fork flex and compliance: Carbon forks with tuned layups can remove buzz without feeling vague. Some steel and titanium forks also ride beautifully.
- Suspension options: Short‑travel forks and compliant seatposts can add control on rocky routes. Keep an eye on added weight and maintenance—use them where they earn their keep.
Material choice is secondary to design. Great aluminum frames exist, and plenty of carbon, steel, and titanium bikes ride poorly if geometry and layup miss the brief. Prioritize clearances, mounts, and fit numbers you can live in for hours.
Drivetrain and gearing: 1x vs 2x that actually works
The best gearing keeps cadence smooth when traction is dicey and climbs are long. A 1x setup simplifies shifting and chain management on rough surfaces, while a 2x can offer tighter cadence steps on rolling terrain. Neither is universally “better.” Choose based on how steep your local climbs are, how fast your flats are, and how much you value simplicity.
Guidelines that cover most riders:
- Low gear target: Aim for the ability to spin at 80–90 rpm on your longest dirt climb. For many, that means 1x with a 38–42T chainring and 10–44/10–52 cassette, or 2x with compact/sub‑compact rings (46/30, 48/31) paired to 11–34 or 10–36.
- High gear target: Enough to pedal up to your typical tailwind or smooth descent speed, not to chase a tuck down a mountain pass. If flats are fast, run a 40–44T ring on 1x or a taller outer ring on 2x.
- Chain security: Narrow‑wide rings and clutch derailleurs reduce chain toss when washboard hits. On 2x, tidy front derailleur setup is critical; trim limits accurately.
Cadence gaps matter when riding in groups or on variable grades. If you notice yourself hunting for a gear that isn’t there, consider a cassette with closer midrange steps or a 2x. If you rarely touch the big ring off pavement, 1x’s simplicity often wins.
Tires: width, casing, and pressure for changing surfaces
Tires are the largest performance lever on a gravel bike. Width sets comfort and footprint; tread and casing trade rolling resistance for grip and durability; pressure ties it all together. Think in families: a fast file or semi‑slick for hardpack and pavement links, an all‑round with small center blocks and supportive shoulders for typical mixed routes, and a chunky option for loose or wet conditions.
Choose widths that match your frame and route:
- 38–42 mm: Efficient on firm surfaces and light; still comfortable on mild washboard.
- 43–47 mm: The all‑round range for most riders. Comfort, grip, and speed balance well here.
- 48–53 mm: Confidence and flotation for sand, embedded rock, and rough doubletrack.
Casing and tread decisions:
- Casing: Supple casings feel fast and smooth but can be more vulnerable on sharp rock. Reinforced casings trade a touch of feel for sturdiness on rugged routes.
- Tread: Slick or fine file for mostly firm surfaces; small blocks with sturdy shoulders for mixed days; deeper knobs for wet clay, roots, or decomposed granite.
Pressure is personal and surface‑dependent. Start low and work up. As a baseline for tubeless at rider+bike 80–90 kg on 42–45 mm tires: high 20s psi front, low 30s psi rear on hardpack; drop a few psi on chunky rock; add a little for heavy bikepacking loads. Heavier riders, narrower tires, and tubes usually need more. After each ride, note traction, comfort, and any rim strikes, then nudge pressures before the next outing.
Wheels, tubeless, and resilience on rough ground
Wheels shape ride feel, responsiveness, and reliability. Wider internal rim widths (23–25 mm for 40–47 mm tires; 25–28 mm for 47–53 mm) support sidewalls and allow lower pressures without squirm. Strong, reasonable‑depth rims are more useful than ultra‑deep profiles in crosswinds or loose conditions. Spoke count and lacing pattern matter: 24/24 holds up for lighter riders on smoother routes; 28–32 spokes add peace of mind on chunky backroads and loaded trips.
Tubeless is the default for gravel thanks to lower pressures and sealant’s ability to deal with small holes. Practical setup steps:
- Use tight‑fitting tape that matches internal width and a good valve with a fresh core.
- Pour measured sealant through the removed core for consistency; refresh by season and usage.
- Seat beads dry first with a blast of air, then add sealant to reduce mess.
- Spin and shake the wheel to coat sidewalls, then check for seepage at spoke holes and valve base.
Carry a small tubeless plug kit and a short tube as a last resort. If you add a tube after a messy puncture, wipe the tire interior so sealant does not undermine tube life. Inspect the casing at home and retire a tire if cords are cut or bulging.
Cockpit setup: bars, flare, levers, tape, and control
The cockpit is your steering and shock absorber. Flared drop bars widen the stance in the drops and give forearm clearance on rough sections. Choose a shape that lets you ride the hoods all day without wrist pressure and the drops with confidence on washboard or descents. Many riders prefer 12–20 degrees of flare and a moderate drop (120–140 mm).
Key refinements that pay off:
- Lever angle and reach: Align levers so wrists are neutral on the hoods. Use reach adjust so one‑finger braking from the drops is consistent even with gloves.
- Stem length and rise: Shorter stems (60–90 mm) quicken steering; a little rise or more stack can relax weight on hands.
- Bar tape and padding: Slightly thicker, grippy tape takes the edge off buzz; double‑wrap under the tops if your routes are very rough.
- Computer and bag placement: Keep mounts and top‑tube bags out of the knee path and cable arcs. Nothing should rattle.
Your cockpit should feel quiet at speed. If your hands buzz or shoulders tense, adjust lever roll by small increments and re‑test on the same loop.
Contact points: saddle, pedals, and footwear
Comfort starts where you meet the bike. Gravel saddles prioritize stable sit‑bone support and a clean relief channel. Firm does not mean harsh; many saddles with firm shells and minimal foam feel best after the first hour because pressure stays consistent.
Pedals should be reliable in dust and grit, easy to clip into on awkward remounts, and supportive enough for long efforts. Two‑sided SPD‑style systems are common for a reason. Pair them with shoes that mix a stiff-enough sole for power transfer and a walkable outsole for hike‑a‑bike sections. Consider toe boxes with a little space; on hot, long days feet swell.
Small wins add up: a dab of clear grease on cleat bolts to avoid corrosion, thread‑locking compound if bolts back out, and the habit of checking cleat wear monthly. If you hear squeaks, clean the interface before assuming something bigger is wrong.
Carrying gear: mounts, cages, and bikepacking bags
The best luggage is silent, secure, and sized to your route. Use the frame’s mounts first because they keep weight centered and low. A top‑tube bag is perfect for food and tools you reach for often. Fork three‑pack mounts carry bottles or small dry bags without crowding the main triangle. Add a small saddle pack for spares, and a handlebar roll only when the day needs extra volume.
Quick packing framework:
- Every ride: Multi‑tool with chain breaker, plugs, spare tube, mini pump or CO2, tire boots, two tire levers.
- Long day loops: Add a small first‑aid pouch, foil blanket, spare derailleur hanger, an extra layer, and water filtration tablets if you’re far from services.
- Overnighters: Distribute weight—sleep kit at bars, dense food in the frame bag, clothing in the saddle pack. Keep heavy items centered.
Strap systems are fine for occasional use but can creep. For frequent adventures, shift toward bolt‑on bags and cages that eliminate wobble. After the first kilometer, nothing should swing, rub, or click.
Navigation, lights, and small tech that earns its weight
Navigation devices and lights do more than add gadgets. A reliable head unit or smartphone mount with offline maps keeps you on course when cell coverage drops. Daytime running lights help you stand out on paved connectors; a compact 800–1200 lumen front light and a bright rear blinky make early starts and dusk finishes more relaxed.
Smart picks:
- Mounts: Solid, centered, and out of the way of your hands; safety tethers for phones on rough ground.
- Power: A small cache battery and short cable live in the top‑tube bag; top off during snack stops.
- Sensors: Cadence and HR help pacing on long days; tire pressure sensors can be useful if you frequently adjust for surface changes.
- Audio: Bone‑conduction or single‑ear solutions keep awareness intact when you want cues or calls.
Record a few standard loops and compare times and perceived effort across setup changes. Real‑world laps are better than lab guesses because they capture wind, surface, and fatigue together.
Maintenance, spares, and pre‑ride checklists
Reliability comes from a simple routine. When you return from a ride, rinse off dust and mud with low pressure, wipe the chain, and lube sparingly. Every few rides, check bolts at the bar, stem, seatpost, calipers, and bottle cages to the manufacturer’s torque values. Spin wheels to spot wobbles, inspect sidewalls, and look for fluid around tubeless plugs or the valve base.
Before the next ride, a quick A–B–C–D–E check keeps surprises low:
- Air: Confirm pressures with a gauge you trust; compare to your last notes.
- Brakes: Pads have material left, rotors are true, and lever feel is firm. If you hear scraping, center the caliper.
- Chain and cassette: Chain moves freely and measures within wear limits; drivetrain shifts smoothly across the range.
- Drive bolts: Chainring, crank, and pulley bolts are snug; pedals spin freely.
- Everything else: No new rattles; bags tight; lights charged; route loaded.
Field spares that save rides: a quick link, spare hanger, short section of chain, tubeless plugs and patches, a small piece of folded tire sidewall as a boot, zip ties, a tiny roll of tape, and cash or a card for the unexpected store stop.
Real‑world templates: three complete builds for different goals
Use these example builds as starting points. Swap specifics to match your local surface and climate, but keep the logic.
Fast mixed‑surface day ride: 42 mm semi‑slick tires on 23–25 mm internal rims; 1x 40T with 10–44 cassette; compact, 12‑degree flared bar; single top‑tube bag with tools and food; two big bottles; daytime lights. Pressure tuned to just avoid rim taps on your roughest segment.
Chunky backroads explorer: 47–50 mm all‑round tires with reinforced casings; 1x 38T with 10–52 for traction climbs; 28–32 spoke wheels; more flare and slightly shorter stem; frame bag for weight centralization; three‑pack fork cages for extra water; small front light and a powerful rear. Add a compliant seatpost or short‑travel fork if your routes routinely dish out embedded rock.
Minimalist overnighter: 45–47 mm tires; 2x sub‑compact (46/30) with 11–34; handlebar roll for sleeping kit, frame bag for dense items, saddle pack for clothing; GPS with offline topo; cache battery; repair kit expanded with extra plugs and a second tube. Dial pressures a bit higher to offset luggage weight and reduce rim strikes.
Testing and tweaking: how to change one thing at a time
Gravel is variable, so the only way to understand a change is to control what you can. Pick a test loop with the surfaces that challenge you most. Change one variable—pressure, lever angle, tire model, chainring size—and ride that loop at a steady, repeatable effort within a few days. After each run, write down subjective notes (comfort, traction, confidence) and objective data (time, average speed, cadence range). Over a few weeks, patterns emerge.
Useful experiments:
- Compare two tire widths of the same model on the same rims.
- Swap from 12 to 16 degrees of flare and note descending control.
- Try a 2T smaller chainring and track cadence on your steepest dirt climb.
- Move a bag from bars to frame and record steering calmness on rough flats.
Trust repeated experience more than single‑ride impressions. Wind, group dynamics, and mood all color results. If a change feels better twice on that loop, it probably is.
Travel and event‑day logistics: packing, staging, and smart habits
Events and destination rides compress decisions into a busy window. Use a simple system to avoid last‑minute stress. Pack by zones—bike, body, bags—and stage items the night before in the order you will use them. Confirm route files on two devices and throw a paper cue sheet in the frame bag for redundancy.
Pre‑event checklist:
- Bike cleaned, bolts checked, chain freshly lubed and wiped; correct chainring and cassette for the course profile.
- Fresh sealant and a trial inflation at your target pressures; spare plugs and tube verified.
- Lights charged, computer updated, maps offline, cache battery packed with cable.
- Clothing layered for the first hour’s temperature, not the day’s high; pack a light shell for descending or unexpected wind.
- Food sorted into reachable packs; hourly plan written on tape on the top tube or saved as a screen on your head unit.
When you finish, a gentle rinse, a quick wipe, and notes about anything that rattled, slipped, or needed attention will make the next outing smoother. Small habits keep the whole system working ride after ride.
Putting it all together
Think of your build as a living kit rather than a fixed spec sheet. With fit dialed, tires chosen by the surface, gearing set to spin the longest climb, a quiet cockpit, sensible luggage, and a simple maintenance routine, your gravel bike becomes a calm, capable partner. Most changes cost far less than a new frame and deliver bigger returns. Keep notes, change one thing at a time, and pay attention to how the bike feels where rubber meets whatever surface you ride next weekend.