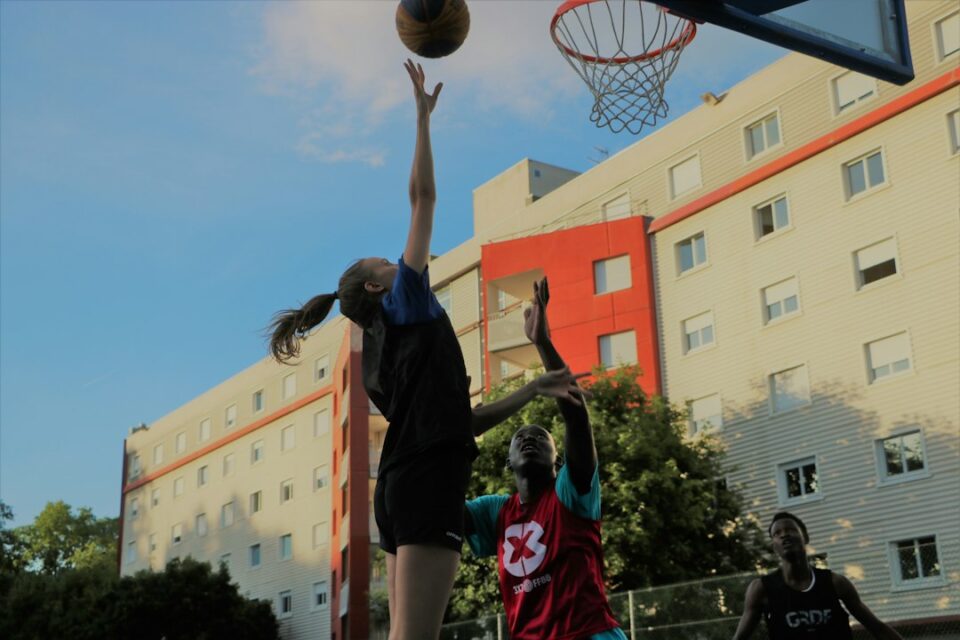
If you want reliable makes under pressure, start with basketball shooting form. Whether you are a player upgrading your jumper or a coach installing a shooting curriculum, you need simple mechanics, repeatable cues, and practice progressions that stand up under game speed. The ideas below blend common-sense fundamentals with modern video and data insights so you can build a shot that feels natural, holds up late in the fourth quarter, and continues to improve without endless tinkering.

Before we dig in, bookmark the AllFreeSports basketball hub for more skill guides and coaching frameworks. You can find it here: AllFreeSports Basketball.
basketball shooting form fundamentals
Strong shooters build from the ground up. Think of your shot as a chain: if the lowest link is weak, everything above gets noisy. Most consistent shooters start with a quiet base, efficient hand placement, clean alignment, and a repeatable release that matches the speed of play. Instead of chasing a perfect template, build a repeatable pattern that suits your body and role. Your goal is not a highlight-reel motion; it is a durable, low-maintenance pattern that produces the same ball flight, again and again, under fatigue.
Here are the five anchors that define most reliable jumpers:
- Balance: A stable base with your center of mass slightly forward, knees unlocked, and weight distributed so you can rise without wobble.
- Alignment: Feet, hips, and shoulders generally pointed toward the target line, with a consistent pickup that aligns the ball to your shooting-side eye.
- Ball Path: A compact path from pickup to set point that avoids detours across the midline or low dips that slow the release.
- Release: A relaxed wrist snap finishing through the rim line, fingers extended, with the ball leaving off the index-middle pair.
- Arc and Spin: A comfortable arc (often 45–55 degrees per common tracking systems) and a light backspin that cushions the rim.
There are elite shooters with quirks. What they all share: rhythm and timing that repeat under stress. Use the anchors above as guardrails rather than rigid rules, then adjust to your build, comfort, and role. A guard who lives on pull-ups may accept a lower set point than a forward who shoots over length. The principle holds either way: simplify variables you can control, and keep changes small.
Stance and balance: the platform that makes every shot easier
Your stance is more than where your feet start; it is how you prepare your body to transfer energy into the ball. The common thread among steady shooters is dynamic balance. That means your base lets you move into the shot without extra sway and recenter yourself on the landing. If your base leaks, your hands will compensate. If your base stacks, your hands can just guide.
Practical cues to test and train balance:
- Stride vs. square: Many players prefer a slight shooting-side foot lead (to open the hips and align the shooting shoulder). Others shoot square. Pick one and build consistency before you experiment.
- Foot pressure: Feel a light tripod on each foot—heel, big toe, little toe. If your heels float, your shot may drift long. If your toes grip, you might lock the ankle and lose fluidity.
- Hip hinge: Bend from the hips, not only the knees. A small hinge stacks the spine and keeps your chest quiet as the ball rises.
- Breathing: Exhale lightly as you rise. It relaxes the shoulders and neck and helps keep the motion smooth.
Balance is easier to maintain when the stance fits the situation. On catch-and-shoots, land into a hop or step with soft knees. On pull-ups, plant the inside foot first, then square or slightly open as you load. In both cases, your goal is a base that lets energy travel up through the hips and torso without detours. A quick field test: after a make, freeze your landing and count a silent beat. If your feet shuffle or your chest sways, the base needs tightening.
Hand placement and grip: control without tension
Grip sets the tone for ball control and release feel. The guiding hand should guide, not steer; the shooting hand should carry the ball with the pads of the fingers, leaving a small air gap under the palm. A flat palm tends to push. A tight squeeze tends to lock the wrist. Aim for a firm yet elastic contact—secure enough to control the ball, loose enough to let the wrist snap.
Simple checkpoints that keep the hands honest:
- Finger spread: Moderate spread on the shooting hand. Too wide and you lose feel; too narrow and you lose control.
- Seam use: When time allows, find a seam with your index-middle pair. It promotes clean spin and consistent friction off the fingertips.
- Guide-hand position: Place the guide hand on the side of the ball with fingers vertical. If the thumb creeps behind the ball, it will add side spin.
- Set point pressure: Feel the ball on the pads of the index and middle fingers. When you lift to the set point, keep the wrist loose so it can snap fluidly.
Two mini-drills help anchor these habits: (1) Shoot five one-handed set shots from three to five feet, focusing on a soft arc and pure backspin. (2) Add the guide hand without changing ball flight. If the ball now curves or wobbles, your guide hand is sneaking in. Cue: “Guide soft, shoot strong.” When your off-hand stays neutral, the ball rides the shot line with less wobble and more forgiveness on rim touches.
Footwork and alignment: getting to your set point on time
Footwork gives you on-time, on-balance shots. Catch-and-shoot opportunities benefit from pre-stance cues—show your hands, call for the ball, and land into a soft base as the pass arrives. Off the dribble, your plants decide the release window. The best shooters match their feet to their set point so the ball and body arrive together.
Footwork patterns to master:
- 1-2 step on catch: Step into the pass with the inside foot, then the outside foot lands quickly and you rise. This pattern times the ball’s arrival with your base and helps you stay on the shot line.
- Hop on catch: A small hop to re-center and load both legs equally. Useful when the pass location varies or a defender closes hard.
- Inside-outside pull-up: For right-handed players going left, the right (inside) foot plants first, then the left; for right-handers going right, the left (inside) foot plants first, then the right. This lets the hips open to the target without over-rotating.
- Drift and relocation: When driving lanes collapse, relocate to a window and prepare to catch with a ready base. Small steps, quiet hips, eyes up.
Alignment does not require a perfect straight line. Many reliable shooters allow a slight toe-out on the shooting side, which naturally opens the hips while still pointing the shot line to the rim. What matters is that your alignment is consistent and matches your release path. If the ball travels up the same rail each time, you simplify timing and reduce directional misses.
The kinetic chain and release timing: turning energy into a soft finish
The kinetic chain is the transfer of energy from the floor through the body to the ball. For smooth releases, you want a clear sequence: load, rise, guide to set point, snap. Inconsistent timing shows up as rushed shoulder lifts, delayed wrist snaps, or late guide-hand releases. Those produce flat arc, hard rim hits, or side-spin misses. Consistent timing creates a repeatable ball flight that holds up when a defender arrives a half-step early or when your legs are heavy in the fourth.
Checks and cues for timing:
- Load-to-rise: Sit and rise without pause. If you stay sunk too long, you lose elastic energy and rhythm.
- Set point path: Bring the ball up the shot line, not across your face. A consistent path shortens your timing window.
- Elbow under ball: Not jammed, not flared. Just under the ball enough to support a clean snap.
- Snap and hold: Relaxed wrist snap and fingers finishing toward the rim, then hold the follow-through just long enough to feel control—not for show, but for feedback.
Tempo matters as much as technique. Count a simple rhythm in your head: “load-rise-snap.” Great shooters sound and look the same on makes and misses because the timing is stable. When fatigue sets in, shorten your dip just a touch and trust your wrist. That keeps the ball on time without turning the shot into a push. The more you practice a steady rhythm across situations, the easier it is to keep the shot compact against late contests.
Arc, trajectory, and spin: building forgiveness into the shot
Arc increases the rim’s effective size and adds forgiveness. Too flat and you need perfect aim; too high and you lose range and speed. Many tracking systems place elite arcs around the mid-40s in degrees, but the key is repeatability within your natural tempo. Backspin adds a soft touch, reducing caroms on light misses and helping long shots drop with a friendlier bounce. Think of arc and spin as insurance, not decoration.
Training arc and spin without tech:
- Ceiling drill: Stand five to eight feet out and aim to clear a consistent imaginary ceiling height. If you hit the real ceiling in a low gym, adjust to a lower reference gauge without flattening too much.
- Net brush: From short range, try to “barely brush” the back of the net. This nudges arc higher and teaches a soft finish.
- Spin check: After a make, watch the bounce. Gentle backspin often pops the ball straight up on the catch or dribble. Side spin kicks it left or right.
- Long-range honest arc: From range, resist the urge to push. Use legs for lift and let the wrist set the arc. If your arc collapses from deep, lower the set point a hair to keep the ball path compact.
A useful mental image: imagine the ball riding a rail to the rim. When arc and spin fit your rail, misses are small and predictable. When they do not, misses stretch and variance grows. Train that rail at different speeds and distances so your arc does not collapse in transitions or late-clock situations.
Game-aware practice plans: drills and progressions that stick
Practice that feels great can still stall in games if it lacks transfer. Design sessions that blend block practice for mechanics with variable practice for decision speed and fatigue. Build layers, not random lists. Each drill should target a clear behavior and progress toward the shots you take most. A good plan makes it easy to start, hard to drift, and obvious what to repeat tomorrow.
Sample weekly structure (three sessions as a baseline):
- Session A: Mechanics block + short variable
- Form shooting 2×10 from five spots (one-hand first, then add guide hand)
- Partner shooting 5×5 catch-and-shoot from corners/wings/top
- Closeout read 3×8—coach closes soft or hard, you shoot or side-dribble
- Session B: Footwork + rhythm
- 1-2 vs. hop 4×6 each from wings
- Pull-up series 3×6 off right/left hand, midrange then arc
- Transition threes 3×6—receive a pitch ahead, small hop load, shoot
- Session C: Game shots under fatigue
- Make-10 ladder—move back every two makes, return on a miss
- 5-shot sequences—corner, wing, top, wing, corner at game pace
- Free throws—shoot two after each sequence to simulate breathing control
Add constraints to force quality: a made shot only counts if the landing is balanced and the follow-through holds for a beat. Add time caps to push tempo without letting technique unravel. Track makes by location and situation so you target weak zones in the next cycle. If you coach a group, assign different start points by role—guards begin with pull-ups; forwards begin with spot-ups; centers begin with short pops—then rotate so each role gets reps in its game diet.
Video, feedback, and simple analytics: tighten the loop
Video speeds learning because the body rarely feels what it actually does. Even a phone camera at 60 fps reveals patterns you cannot sense in the moment. Pair short clips with quick cues; do not drown yourself in slow-motion analysis all the time. The goal is a fast loop: see it, cue it, try it, check it.
Practical filming checklist:
- Angles: Front (aim/alignment), side (arc and path), rear (guide hand and shoulder line). Keep shots short and purposeful.
- Clips not montages: Record in small sets of five to ten reps. Review between sets to reinforce a single cue.
- Labels: Note drill, distance, and cue in your phone notes. Over time, you will see which cues stick.
- Compare makes/misses: Watch one made shot and one miss back-to-back. Look for differences in base height, ball path, and wrist speed.
Data does not require expensive trackers. A simple chart of attempts by spot and situation can guide your next practice. Track three percentages weekly: catch-and-shoot, pull-up, and free throws. Add a confidence note out of ten. Often, confidence and mechanics move together; when they do not, look for fatigue or game-context mismatches. A quick metric set for individuals: (1) 50 makes form shooting, (2) 40 makes spot-up by five spots, (3) 20 makes pull-up midrange, (4) 20 makes off the catch from range, (5) 25 free throws. Record time and misses for each block.
Adapting to context: catch-and-shoot, off the dribble, late-clock, and free throws
Shots change with context. Build a base pattern, then adjust in small ways for the catch, the dribble, the clock, and the line. The more you rehearse these micro-adjustments in practice, the less you think about them in games.
Catch-and-shoot: Your job is to beat the closeout with balance. Pre-align the feet during the pass, meet the ball with your hands, land into a soft hop or 1-2, and get the ball to the set point on the rise. Cue: “Catch high, shoot higher.” If you regularly drift forward, practice stopping on a dime and freezing the landing for a count before jogging to the next rep.
Off the dribble: The ball and body must arrive together. Keep the pickup compact—no extra dribbles to gather—and plant the inside foot first to stop drift. Cue: “Plant, pop, snap.” For step-backs, exaggerate the sit on the back foot, then ride the rail up with a quiet chest so the ball stays on line even as you create space.
Late-clock or contested: Aim for a slightly higher set point to protect the ball, and use your legs for lift rather than muscling with the shoulders. A small extra arc provides insurance without turning the shot into a rainbow. Train this by shooting with a pad lightly touching your off-shoulder to remind you to lift without hunching.
Free throws: Build a calm routine that controls breathing, grip, and focus. Same foot placement each time, same ball bounces, same exhale, same wrist snap. Cue: “Deep breath, soft snap.” If you miss left or right consistently, check guide-hand thumb involvement and shoulder line. If you miss long or short, adjust load depth rather than forcing extra wrist speed. Write your routine on a small card and revisit it at the start of each week.
Troubleshooting guide: common misses and targeted fixes
Every miss pattern points to a potential cause. Use this checklist to move from symptom to experiment quickly. The goal is not to overthink, but to choose one clear cue, test ten shots, review, then keep or discard the cue.
- Miss long/short
- Long: Overly flat arc, late release, or too much upper-body push. Try a slightly deeper load, a quicker wrist snap, and a cue to “see” the ball peak.
- Short: Early release or fatigue. Cue: “Rise through the shot,” and check that the ball reaches the set point before the wrist fires.
- Miss left/right
- Left for right-handers: Guide-hand thumb or flared elbow. Soften the guide hand and keep the elbow comfortably under the ball.
- Right for right-handers: Over-open stance or pull across the face. Square a touch and bring the ball up the shot line.
- Flat arc
- Excess tension in shoulders and wrists. Shake out the hands between reps and focus on a smooth, continuous rise.
- Set point too low for distance. Raise the set point slightly at range while keeping the ball path compact.
- Wobble or sidespin
- Guide hand steering. Shoot five one-handers, then add the guide hand without changing ball flight.
- Palm pushing. Reclaim the finger-pad feel and relax the wrist.
- Slow release
- Big dip or long carry. Shorten the ball path and practice “on the rise” pickups at close range.
- Hesitation in the load. Train with a metronome-like rhythm: load-rise-snap.
Map your top two misses and assign one cue each. You can print this list and circle the cues that work for you. Over a month, you should see the same two or three cues bubbling up. Fold those into your pre-practice routine so fixes become habits rather than emergency patches.
Equipment, environment, and maintenance: small edges that add up
Great mechanics matter most, but small environment and equipment choices make it easier to be consistent. A consistent ball, predictable court markings, and a familiar routine reduce noise. Nothing here replaces practice; it just helps practice transfer.
Practical notes:
- Ball feel: Use a ball whose grip and size match the league you play. Switching textures day-to-day changes friction feedback on the fingertips.
- Shoes and base: Train in shoes you actually play in. Different stack heights and tread patterns slightly change foot pressure and balance.
- Backboards and rims: Practice on the type you play on most. Stiff rims reduce forgiveness; soft rims reward touch. Adjust arc expectations accordingly.
- Warm-up routine: Build a warm-up that hits each layer: form shots, one-hand set shots, short-range rhythm shots, spot-up series, then game-speed sequences. Ten minutes is enough if your cues are tight.
- Recovery and consistency: Consistency grows with modest, regular work. Short, focused sessions build timing through frequent, quality reps.
Maintenance also includes light mobility for ankles, hips, and thoracic spine. A few minutes of ankle circles, hip hinges, and upper-back rotations before practice keeps the chain moving freely so your release stays smooth across a long season.
Seasonal, role, and body-specific adaptations
Shooting is not one-size-fits-all. Your role, body type, and season phase inform how you build and maintain your shot. Adjust with intention so you preserve strengths while shoring up weak links.
In-season vs. off-season: During the season, favor shorter, higher-frequency sessions that protect energy. Use five to ten minute shooting “maintenance windows” around practices and lifts. In the off-season, run longer blocks for retooling mechanics and pushing range. Keep one day a week for audit: video a few sets, review cues, and update your plan.
Role-based tweaks: Primary ball handlers need a compact pickup and stable pull-up base at multiple speeds. Wings who space the floor need consistent feet on relocations and incoming passes from different angles. Bigs benefit from a stable short jumper with elbows under and a high set point to shoot over length. For each role, list your three most common shots and assign a mini-drill for each so your work maps to your role.
Body-specific adjustments: If your shoulders are tight, lower the set point slightly and lean on leg drive to protect arc. If your hands are small, emphasize finding the seam and keeping the ball centered on the index-middle pads. If your hips feel stiff, add extra hip-hinge practice and simplify the base until you regain fluidity. The theme is steady: make changes small and test them for a week before deciding whether they help.
Youth considerations: Youth players benefit from lighter balls and shorter lines to learn arc and spin without strain. Emphasize one-hand form shooting, soft landings, and fun constraints like “net brush only.” Avoid chasing range early; build a rail first, then distance.
Role-specific drills and situational shooting
Turning mechanics into game-ready skill means drilling the shots you actually take. Role-specific blocks cut out filler and improve transfer. Use the following situational templates to structure efficient reps.
Point guards (PG):
- Pull-up off drag screen: Start at half court, receive a drag, take one dribble, plant inside-outside, pop to midrange or arc. 3×6 each side. Cue: “Plant, pop, snap.”
- Two-for-one burst: Partner tosses out to the wing with five seconds on the clock; one escape dribble into a quick pull. 4×5 with a time cap.
- Paint touch kickout: Drive to the nail, jump stop, kick to a partner, backpedal to the slot for a return pass, shoot on the rise. 3×8.
Shooting guards and wings (SG/SF):
- Relocation series: Start in the corner, drift to the wing as a partner drives, catch-high-shoot-higher. 4×6.
- Flare catch: Simulate a flare screen, hop catch with shoulders already turned, raise to set point. 3×6 each side.
- Pin-down read: From the block, sprint off an imaginary pin, square early, shoot if open or take one-dribble pull. 4×5.
Forwards and centers (PF/C):
- Pick-and-pop: Set a ghost screen, pop to 15–18 feet, 1-2 into a quick snap. 4×5 from each slot.
- Short-roll floater/shot: Catch at the free-throw line, decide between a soft push or quick jumper. 3×8 alternating.
- Trail three: Arrive late in transition, hop into range, and shoot with a soft landing. 3×6.
Record percentages for each drill weekly. If a drill stays below your standard for two weeks, adjust the cue, simplify the footwork, or reduce distance until the rail stabilizes. Then rebuild speed or range one small notch at a time.
Strength, mobility, and durability for better rhythm
Shooting rhythm benefits from simple strength and mobility habits. You do not need a heavy program to help your jumper; you need consistent care that preserves joint range and leg pop while avoiding fatigue overlap with high-volume skill work.
Micro-strength blocks (two to three times per week, 10–15 minutes):
- Calf raises 2×12 each side (both straight-knee and bent-knee variations) to support lift and soft landings.
- Split squats 2×8 each side with slow lowerings to groove balance under load.
- Band pull-aparts 2×15 for scapular control, supporting a quiet chest and smooth set point lift.
- Forearm flexor/extensor work 2×12 to reduce hand tension and improve fingertip feel.
Mobility mini-series (three to five minutes before shooting): ankle rocks, hip hinges, thoracic rotations, and wrist circles. The goal is not to chase flexibility; it is to restore your normal range so the rail feels the same even on tight days. If a particular joint feels sticky, add one extra set for that area and recheck your shot feel.
Place these blocks after skill sessions on heavy practice days and before on lighter days. Keep them light enough that they support, rather than compete with, your shooting rhythm.
Daily routines and accountability systems
Consistency beats intensity for skill maintenance. Short, clear routines reduce decision friction and make it easier to string together good days. Pair routines with a simple accountability system so progress is visible and adjustments are grounded in data, not mood.
15-minute daily (when time is tight):
- Two minutes: one-hand form shooting, five spots.
- Four minutes: catch-and-shoot, two spots, 1-2 and hop.
- Four minutes: pull-up series left and right, midrange only.
- Two minutes: free throws (10–15 total).
- Three minutes: video two sets and review one cue.
30–45 minute standard (most days):
- Five-minute warm-up: mobility plus form shots.
- 10 minutes: spot-up progression—short to long, five spots.
- 10 minutes: off-the-dribble progression—midrange and arc.
- Five minutes: transition and late-clock situational reps.
- Five minutes: free throws embedded between sets.
Accountability: Use a small notebook or phone spreadsheet with columns for date, cues used, locations, makes/attempts, confidence (1–10), and one sentence on context (fatigue, time of day, court type). Review weekly. If confidence dips without a mechanical change, assess sleep, schedule, and load before adjusting technique. The best shooters are often the most consistent record-keepers.
Coaching language and cue design: say less, mean more
Coaches and self-coaching players benefit from concise, vivid cues. The brain handles simple images better than long instructions. A cue should be easy to remember, quick to apply, and tied to one behavior at a time. The best cues often reference feel or outcome rather than joint angles.
Useful categories of cues:
- External focus: Aim focus at the rim, the arc apex, or the ball flight. Example: “Brush the back of the net.”
- Rhythm cues: Words that sync timing. Example: “Load-rise-snap.”
- Feel cues: Sensations in the hands or feet. Example: “Pads, not palm.”
- Context cues: Situation-based. Example: for transition threes, “Catch high, shoot higher.”
Keep a short cue library and avoid stacking two or three cues on one rep. Cue during preparation, not during the release, and use video to confirm the cue is linked to the outcome you want. If a cue does not move the needle after a few sets, swap it out rather than forcing it. As players grow, encourage them to create their own cues so ownership and transfer increase.
Pulling it together: a simple blueprint you can start today
Put these pieces into a compact plan you can run without fuss. Start each session with ten one-hand form shots and ten with the guide hand, then move to 1-2 and hop catches from your most common spots. Add five pull-ups per side from midrange and arc. Finish with a fatigue set of ten transition threes and two free throws after each five-shot segment. Record makes by spot and note one cue that helped most. The next day, keep the cue if it works or try a new one if you plateau.
As your comfort grows, vary distance and speed while keeping the same core mechanics. Maintain a balanced base, align the ball to your shot line, lift smoothly to your set point, snap the wrist with a soft finish, and let the arc and spin do the rest. When the game speeds up, your shot should feel like a familiar song played a little faster, not a brand-new tune. Build rhythm, not rigidness, and your basketball shooting form will keep improving long after the first wave of progress.