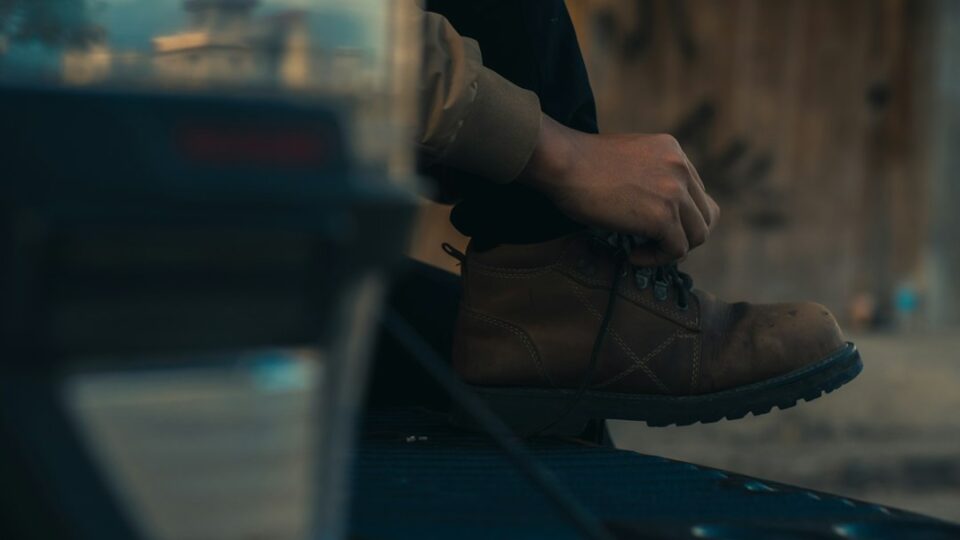
If you want faster learning curves, warmer toes, and more control on every run, start with snowboard boot fitting. Whether you are buying your first pair or trying to fix nagging hot spots in boots you already own, getting the fit right is the single biggest upgrade you can make to your riding comfort and board feel.
Think about it this way: your boots are the one piece of equipment that touches you all day. They translate every movement you make into pressure on the board. When they fit right, you feel planted, balanced, and confident. When they don’t, you fight your gear instead of the hill. This guide breaks boot fit into manageable steps, explains the why behind each step, and gives you checklists you can carry into a shop or apply at home. It’s designed for riders at every level who want to spend more time smiling and less time fiddling with buckles or unlacing on the side of the trail.
Across the sections below you will learn how boot anatomy and flex interact with your style, how to size accurately, what a proper shell fit feels like, the pros and cons of lacing systems, how and when to heat mold liners, what footbeds and socks do, how bindings and stance can change fit, and how to troubleshoot common pain points like heel lift and numb toes. By the end you’ll have a repeatable process to dial your boots in at the start of the season and keep them riding well through spring.
snowboard boot fitting basics
A great fit balances three things: control, comfort, and circulation. Control means the boot holds your heel down and wraps your midfoot without collapsing when you pressure the board. Comfort means the liner supports your foot’s shape without grinding bones or compressing nerves. Circulation means blood can flow so your toes stay warm and responsive. You can feel all three in a few minutes with a simple sequence: measure, shell check, lace, stand, flex, and evaluate.
Start by identifying your true foot length and width (details later). Next, do a shell fit check with the liner removed: slide your foot into the empty shell, toes just touching the front, and look for 10–20 mm of space behind your heel. Less than that and the boot may be too short; much more and you’ll struggle with heel hold. Reinsert the liner, lace up, and stand in a natural athletic stance. Flex forward as if initiating a turn and feel for heel lift. Good fit means your heel barely moves, the boot flexes with you instead of collapsing around you, and your toes just kiss the front when you drive forward but relax back when you stand neutral.
Patience helps. Most liners pack in a little, so a brand-new boot that feels comfortably snug in the shop will usually become perfect after 2–5 days of riding. If it feels loose brand new, it will only get looser. If it crushes your arch or pinches a bone hard enough to feel sharp, address it early with lace tension changes, liner molding, or spot adjustments before it becomes a habit your body compensates around.
Anatomy of a boot and why fit matters
Understanding the parts of a snowboard boot makes it easier to tune the fit. Most modern boots have a durable outer shell, a cushioned liner, an insole or footbed, and a lacing or closure system. The shell provides structure and protection. The liner wraps the foot and ankle and usually handles most of the hugging and cushioning. The footbed supports your arch and reduces fatigue. The closure system—traditional laces, BOA dials, hybrid systems—tightens everything together.
Flex rating is a crucial part of this anatomy. Softer boots are more forgiving and are often preferred by beginners, park riders, and surfy freeriders who want playful flex. Stiffer boots are more precise for aggressive carving, high-speed freeride, and boarders who want maximum edge power. Flex is not a standard measurement across brands, so it’s better to think in categories (soft/medium/firm) and try on several models rather than chasing a number.
Heel hold comes primarily from the liner and the way the shell and cuff wrap above your ankle bones. If your heel feels locked in when you flex, you’ll get better energy transfer and fewer blisters. If your heel pops up, you’ll ride cautiously and burn energy tightening laces. The tongue and cuff shape matter too: a stiff, properly shaped tongue spreads pressure across your shin, while poorly aligned cuffs can dig in. Knowing which component is responsible for which sensation helps you troubleshoot efficiently, saving time and costs.
Sizing and measuring: length, width, and shell fit
Accurate sizing starts with good measurements. If you have access to a Brannock device at a shop, use it to measure both feet for length and width while standing. At home, trace your longest foot on paper and measure heel-to-toe in millimeters. Many boot brands use mondo sizing (centimeters), so a 27.5 mondo boot is roughly a 275 mm foot length. Measure both feet because most people have a longer foot; size for the larger one and adjust volume for the smaller as needed.
Shell fit test: remove the liner, slide your foot into the empty shell, and push your toes forward until they just touch. Check the gap behind the heel. A target gap of roughly 10–20 mm typically yields a performance-friendly fit once the liner is back in. Less than 10 mm often means cramped toes; over 20 mm often means a loose, heel-lifty ride.
Width and volume: If your forefoot feels crushed or your little toe hits the shell, you may need a model with a wider last or a shell that is known to punch more easily. Conversely, if your foot swims, look for low-volume boots or use volume shims or thicker socks (within reason). Remember that socks compress too; thin, high-quality snowboard socks almost always provide better feel and warmth than thick cotton socks.
Try-on sequence checklist:
- Try boots late in the day or after a walk so your feet are slightly expanded like they get on the hill.
- Use the socks you actually ride in; thin, merino-rich socks are ideal.
- Shell check the gap, then reinsert the liner and lace fully.
- Stand in riding stance, flex forward and side to side, and feel for consistent pressure.
- Assess heel hold, toe room, arch support, and shin comfort.
Flex, volume, and matching fit to your riding style
There is no universal perfect boot—only the best boot for your body and your terrain. A lighter rider may find a medium-flex boot plenty supportive, while a heavier rider needs more structure to get similar response. If you ride mainly park and want tweakability, softer flex and a forgiving liner feel balanced. If you ride steep groomers or off-piste lines, more supportive cuffs and beefier tongues help you hold an edge with confidence.
Volume matters because it dictates how the boot fills space around your foot and lower leg. High-volume feet need shells with more internal space and liners that won’t crush delicate bones. Low-volume feet benefit from snugger shells and liners with extra wrap. Many brands now offer different lasts or women’s-specific shapes that account for narrower heels and different calf shapes. Matching volume prevents over-tightening laces just to stop movement, which often causes pressure points and cold toes.
Think of fit as a system: board, bindings, and boots work together. A stiffer boot with a soft, surfy board can still feel supportive. A softer boot with a rigid board might feel vague. Choose a flex category that complements your board and binding setup, then fine tune fit so you can ride relaxed instead of bracing against sloppy movement or painful hotspots.
Lacing systems compared: traditional, BOA, and hybrid
Laces do more than keep the boot on your foot; they control how pressure is distributed and how easily you can micro-adjust. Traditional laces are inexpensive, field-serviceable, and allow infinite tension zones if you’re patient. Their downside is speed and the tendency to loosen if not tied carefully. Single-BOA systems offer quick tightening and convenience with one dial, but can sometimes over-tighten one zone while leaving another loose. Dual-BOA or hybrid systems split the upper and lower zones so you can dial heel hold independently from cuff pressure, which many riders love for quick on-hill tweaks.
When evaluating closures, think in zones: forefoot/midfoot, ankle/instep, and cuff/shin. Aim for firm midfoot wrap to reduce sliding, snug but not crushing tension at the instep to lock the heel, and a supportive yet comfortable cuff to avoid shin bite. If a boot has lace hooks or locks midway, you can tie off the lower zone and then tension the upper separately. Try different patterns—criss-cross for broad pressure, skip an eyelet over a bony spot, or use a surgeon’s knot over the instep to keep pressure where it matters.
Maintenance counts too. BOA cables should be inspected for fraying and kept clean of ice. Laces should be replaced when they show wear. Keep spare laces or a BOA repair kit in your car or travel bag. The best system is the one you can adjust in gloves, on a windy ridge, without a wrestling match.
Liners, heat molding, and the break-in plan
Modern liners are marvels: they add warmth, cushion, and structure while shaping to your foot over time. Many are heat-moldable, which accelerates the break-in. Heat molding, done properly, can create space over sensitive bones and tighten up heel hold without over-tightening laces. Shops typically use convection ovens or dedicated heaters set to a safe temperature for a short period, then place the liners back on your feet while you stand in a riding stance as they cool.
Before molding, mark problem areas with a light piece of tape so a fitter can add a small pad to create a bit of relief. Consider using a toe cap (a thin sock over your toes) to ensure a touch more wiggle room up front. During molding, stand in your normal stance and mimic your riding posture so the liner forms around how you actually move. Once cooled, let the liner fully set before walking long distances.
Even without heat molding, liners will pack in naturally. A realistic break-in plan is two to five on-snow days for the fit to stabilize. Early rides should include frequent short breaks to tweak lace tension and evaluate pressure points. If a spot remains stubborn, revisit a shop for a quick punch, liner adjustment, or footbed tweak. Small, early interventions save you from enduring discomfort that drains your energy.
Footbeds, socks, and circulation management
Footbeds (insoles) change how pressure spreads across your foot and can improve comfort and edge control. Many stock footbeds are flat and cushiony but offer little support. An aftermarket insole that suits your arch profile can reduce fatigue by holding your foot in a neutral position and preventing collapse that causes hot spots or numbness. Some riders do well with prefabricated footbeds sized to their arch height; others benefit from custom options from a professional. The goal is stable, balanced support rather than aggressive arch pressure.
Socks are more important than most people realize. Thin, high-quality snowboard socks made from merino blends or synthetics manage moisture and maintain warmth without adding bulk. Thick socks often compress circulation or bunch up, causing friction. One well-fitted pair beats doubling up. Keep a spare pair in your bag for multi-day trips.
Circulation management is about keeping toes warm and nerves happy. Leave a tiny bit of wiggle room for your toes, especially after you tighten the instep. If your toes go numb, reduce pressure over the forefoot or instep before assuming you need a larger boot. Small changes—loosening the lower zone a notch, shifting a lace pattern, using a slightly thinner sock—often restore feel. Warmth also comes from dry liners; dry boots each night and avoid leaving them closed up in a cold car.
Bindings and stance: the hidden fit influences
Bindings amplify or undermine boot fit depending on their straps, highback angle, and the way they interface with the boot. A well-positioned ankle strap sits just above your instep and locks the heel down without crushing the top of your foot. Toe straps should pull the boot into the heel cup rather than push down on the toes. Adjust strap length so you’re within the middle of the ladder for maximum range of micro-adjustment.
Highback rotation and forward lean change how pressure travels up your shin. If you suffer from shin tenderness, experiment with slightly less forward lean or a cuff that better matches your leg shape. Stance width and angles affect how your knees stack over your feet; a more natural stance can relieve pressure on the outside or inside of your foot. Sometimes a small binding tweak solves a “boot” problem. Treat the board, bindings, and boots like a system and test one change at a time.
Finally, ensure the boot actually fits the binding size. If the boot’s outsole is too long for the binding, you may end up overtightening straps and creating new pressure points. Most binding brands publish size charts by boot size; follow them, and if you straddle a size, try both.
Troubleshooting: hotspots, heel lift, and numb toes
Even a careful fit can need a few refinements. Use this quick reference to address the most common problems without guesswork.
Quick troubleshooting checklist
- Heel lift: Add or increase instep tension using a surgeon’s knot; try J-bars or ankle wraps in the liner; consider a boot with a narrower heel pocket; check that your bindings’ ankle strap is positioned correctly.
- Hot spots over bones: Slightly loosen the specific lace segment; skip an eyelet over the spot; add a small liner pad during heat molding to create a relief pocket; use a footbed that stabilizes your arch to reduce overpronation.
- Numb toes: Loosen forefoot/instep by a notch; ensure toes have minimal wiggle room; switch to thinner socks; check binding strap placement; dry liners thoroughly between days.
- Shin tenderness: Reduce forward lean; adjust lacing pattern to distribute pressure; consider a boot with a more anatomical tongue; check that socks are smooth and not wrinkled at the shin.
- Cold feet: Dry liners nightly; use merino socks; avoid over-tightening that compresses circulation; consider a thin, breathable toe cap rather than thicker socks.
Keep small adjustments incremental and test on snow. Changing three things at once makes it hard to know which solved the issue. Document what works so you can repeat it next time.
Women’s, wide, narrow, and junior-specific considerations
Not all feet are shaped the same, and not all calves sit at the same height. Women’s-specific boots often feature narrower heels, different cuff shapes, and flex patterns that better match smaller frames or different leverage points. Riders with low-volume heels benefit from liners with built-in ankle pockets or add-on J-bars. Riders with high insteps may prefer boots with more adjustable lower zones or softer tongues to relieve pressure.
If you have wide forefeet or tailor’s bunions, prioritize boots known for wider lasts or shells that respond well to a fitter’s punches. Conversely, if your feet are narrow, look for low-volume shells and liners with extra wrap. For juniors, remember that growth happens fast. Choose a snug-but-not-restrictive fit and resist the temptation to size up “for next year.” Oversized boots are hard to learn in and can create bad habits and falls. Revisit fit mid-season if a growth spurt changes things.
Calf fit is another nuance. If you have larger calves, try boots with adjustable or softer cuffs and consider a stance with slightly less forward lean. If your calves are lower on the leg or you have a pronounced Achilles, test how the cuff wraps when you flex; an anatomical cuff reduces hot spots significantly.
Shop vs. home fit sessions: process, timing, and costs
Working with a knowledgeable shop shortens the learning curve. A good fitter will measure both feet, assess your arch type and ankle mobility, and recommend models that match your volume and riding goals. Shops often include heat molding and small adjustments when you purchase boots there, which can be cost-effective compared to buying online and guessing.
If you are fitting at home, set up a calm environment. Use the socks you ride in, do a shell fit check, and take time to vary lacing by zones to feel the changes. You can safely heat mold many liners with proper guidance, but if you’re uncertain, defer to a shop. Schedule your boot purchase a few weeks before your first big trip so you have time to break them in locally and return for tweaks if needed.
Bring your bindings to the shop if possible. Testing boots in your own bindings exposes interface issues early. Keep receipts and be aware of return policies; some retailers allow exchanges after a short indoor test but not after riding outdoors. Communication helps—describe what you feel, where, and when, and your fitter can suggest targeted adjustments instead of broad, less effective changes.
Care and maintenance: drying, hygiene, and storage
Daily care extends boot life and maintains fit. After riding, pull the liners and footbeds out to dry. Use a gentle boot dryer or room-temperature airflow; avoid high heat, which can deform materials. Brush off snow and ice from the shell, and leave laces or BOA systems slightly open so everything breathes.
For hygiene and comfort, keep socks clean and rotate pairs. If odor builds, use mild, boot-safe sprays or let liners sit in sunlight briefly for a natural refresh. Inspect footbeds for flattening; a fresh footbed can make old boots feel alive again. Watch for fraying laces, worn BOA cables, delaminating soles, or cracked outsoles and address them early. Small repairs and replacements keep a good fit going longer.
During the off-season, store boots dry in a cool place with the liners removed or loosely installed to preserve shape. Avoid stacking heavy items on top. Label which boot has any special pads or J-bars so you can reinstall them correctly next season. A simple log of what fit tweaks you made and why becomes a handy reference when you pull the boots out again.
Common myths and mistakes about boot fit
Mistake one: assuming bigger is safer. Oversized boots feel cozy at first but produce heel lift, sloppy response, and fatigue. Mistake two: cranking every dial or lace to maximum. Over-tightening reduces circulation and masks the real issue. Mistake three: expecting identical fit across brands or models. Shapes and materials vary widely; try multiple options. Mistake four: blaming your board for every control issue. Often the boot-binder interface or fit is the actual culprit, and a small tweak unlocks control you already have.
Myth one: thicker socks are warmer. In reality, thin, well-fitting socks that stay dry often keep toes happier. Myth two: a stiff boot is automatically better for advanced riders. Many experts prefer medium flex for feel and agility. Myth three: heat molding fixes any problem. Molding helps, but it’s most effective when used to polish a nearly right fit, not to rescue an obviously wrong size.
Approach fit as a skill you practice. The more you notice and adjust, the faster you can replicate comfort and control across different conditions and boards. Keep a sense of curiosity and avoid quick, sweeping fixes. Subtle, informed changes deliver the best results.
A practical, repeatable boot-fit routine
Here is a concise routine you can revisit every season or whenever new boots enter your life.
- Measure: Confirm length and width for both feet; note arch height.
- Preselect: Shortlist models that match your volume and riding goals.
- Shell fit: Check heel gap of roughly 10–20 mm.
- Lace zones: Set midfoot snug, instep secure, cuff supportive without bite.
- Flex test: Mimic turns; check heel hold and toe contact.
- Mold and tweak: Heat mold with pads as needed; add J-bars or swap footbeds if helpful.
- Ride and refine: Take short laps, record impressions, adjust one variable at a time.
- Maintain: Dry liners, inspect closures, refresh footbeds mid-season if needed.
If you want more snowboarding technique and equipment guidance, explore our resources at AllFreeSports Snowboarding for step-by-step articles and gear guides tailored to different skill levels and terrain preferences.
Final thoughts: comfort that builds confidence
Dialed boots transform your day. With the right size, smart lacing, supportive footbeds, and thoughtful liner shaping, you conserve energy, react faster, and enjoy a steadier platform underfoot. You don’t chase comfort; comfort quietly supports every turn. Start with careful measurement, follow a clear process, and treat small issues early. The reward is tangible—cleaner carves, calmer feet, and more time focused on the mountain rather than your gear.
Remember, great fit is a partnership between your body, your equipment, and your habits. Stay curious, make changes deliberately, and keep notes on what works. Snowboarding gives immediate feedback; when your boots fit, the mountain tells you so. Take that confidence into new terrain and conditions, and you’ll discover how much easier progression feels when your foundation is solid.