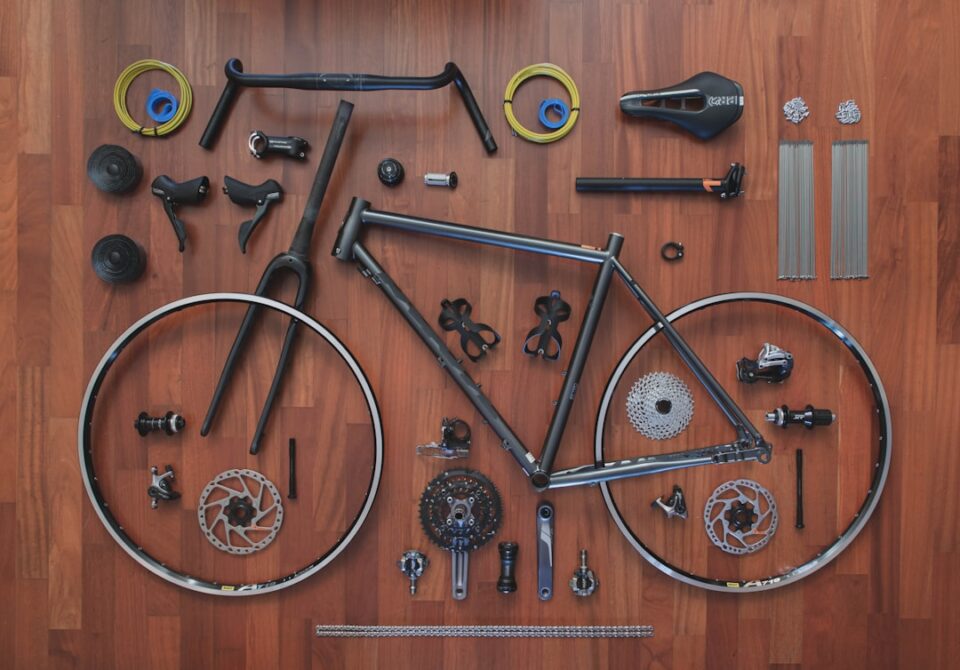
If you’ve ever clattered over washboard on a dusty farm road and thought “this could be smoother,” the answer is often a simple one: better care. This guide is built around a practical Gravel Bike Maintenance Checklist designed to keep your bike fast, quiet, and reliable without turning your life into a full-time wrenching job.
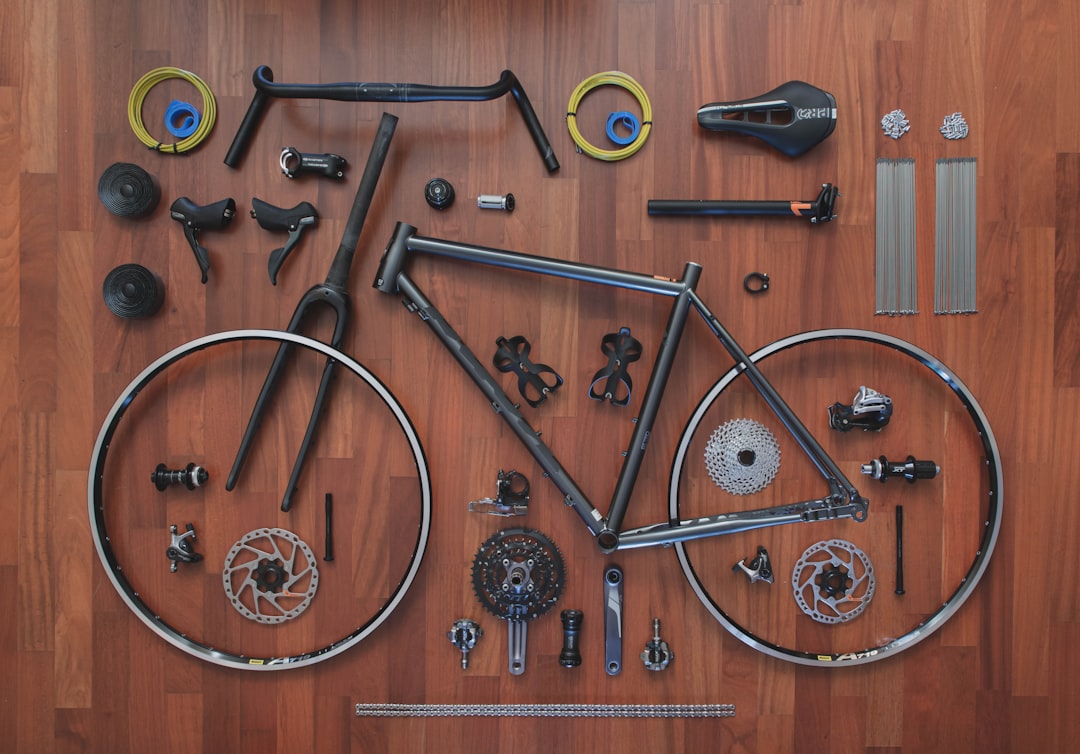
Below you’ll find what to check before you roll, what to do right after the ride, and what to schedule weekly, monthly, and seasonally. Each section has specific steps, torque tips, and measurements you can actually use, whether you ride 50 kilometers on the weekend or stack centuries on dirt. For more riding ideas and skills articles, visit AllFreeSports and explore the cycling content there.
Gravel Bike Maintenance Checklist: What It Covers
This checklist focuses on habits that deliver the biggest gains in reliability per minute spent. Gravel bikes live a tough life: dust, mud, washboard vibration, and sometimes rain or river crossings. Those conditions can turn a silent, crisp bike into a squeaky, skipping mess quickly. The plan here balances quick routines with deeper service that extends component life and keeps handling consistent.
- Pre-ride checks you can do in about 60 seconds
- Post-ride care to stop grit from turning into grinding paste
- Weekly and monthly tasks with mileage cues (e.g., every 150–250 km, every 800–1200 km)
- Drivetrain steps that reduce noise and stretch the lifespan of chains and cassettes
- Brake inspection and feel tuning so you stop confidently in loose terrain
- Wheel, hub, and tubeless tire care, including sealant top-ups and field repairs
- Frame and bearing checks to catch small issues early
- Mechanical vs electronic shifting care, including firmware etiquette
- Seasonal overhaul and storage plan so your first spring ride feels great
Keep a small notebook or phone note for torque values, sealant dates, and bleed intervals. Label it with your bike’s name so you actually use it. You’ll find a “torque map” approach later that simplifies this.
The 60‑Second Pre‑Ride Check
These are the four signals that tell you whether your bike is good to go. No stand, no tools beyond a pump, and it truly takes about a minute once you have the rhythm.
- Tires and pressure: Press with your thumb or use a gauge. If you ride tubeless, pressures are often in the 30–50 psi (2.1–3.4 bar) range depending on rider weight and tire width. Confirm both tires are holding air from the last ride. If you hear sealant sloshing, that’s fine; if it sounds dry and the tire feels lifeless, you probably need a top-up soon.
- Brakes: Squeeze the levers hard. You’re feeling for firm engagement and even lever travel. If a lever pulls to the bar or feels spongy, you may have air or heat-damaged fluid in the system and should schedule a bleed.
- Drivetrain: Pedal backward three or four turns and listen. It should sound like a soft hum, not a squeak. Shift up and down a few gears in the stand or rolling slowly to ensure quick index and no skipping.
- Quick releases/through-axles: Confirm both are closed and snug. Front axles sometimes loosen slightly after lots of washboard; a quick re-tighten avoids play.
Bonus: bounce the bike gently and listen. Creaks usually come from loose bolts, dirty interfaces, or a dry chain. Small noises rarely fix themselves on rough roads.
The 5‑Minute Post‑Ride Routine
The goal after a gravel ride is to stop grit from embedding in moving parts. A short, consistent routine does more than occasional marathon cleaning. Do this in your driveway, at the trailhead, or outside your apartment.
- Rinse smart: Use low pressure—think garden mist, not power washer. Focus on tires, frame, and drivetrain. Avoid blasting directly into bottom bracket, headset, or hub seals.
- Brush and spin: Use a soft brush and mild bike wash to lift dust. Spin the drivetrain by hand while brushing chainrings, jockey wheels, and cassette to float grit off rather than pushing it deeper.
- Dry and lube: Towel off the chain quickly, then apply a drop of chain lube to each roller while backpedaling. Wipe excess thoroughly. Dry lube tends to attract less dust; wet lube lasts longer in rain and creek crossings. In arid, dusty regions, a modern wax-based drip lube can keep things quieter between full hot-wax sessions if that’s your style.
- Check pads and tires: Look at brake pad thickness; if you can barely see friction material, plan a swap. Inspect tires for embedded thorns or cuts and pick debris out now rather than on the next ride.
Finishing this routine while your legs still feel strong builds a habit loop. Tomorrow’s ride will be quieter because of what you did today.
Weekly Tasks: 150–250 km
Depending on grit levels and mileage, aim to do these once a week or roughly every 150–250 km of mixed-surface riding.
- Chain wear check: Use a reliable gauge. Replace around 0.5%–0.75% elongation to protect cassette. On 12-speed systems, err on the earlier side.
- Torque spot-check: Confirm key bolts are snug to spec: stem faceplate, steerer clamp, seatpost collar, caliper bolts, derailleur mounting bolt. A small 2–14 Nm torque wrench is perfect.
- Brake alignment: Loosen caliper bolts slightly, squeeze the lever to center the caliper, then tighten to spec. Spin the wheel to confirm no rubbing.
- Tubeless top-up test: If you ride through puncture country or heat, crack a bead slightly to peek at sealant. If it looks thin or clumpy, add 30–60 ml per tire.
- Wheel true and hub feel: Spin wheels. Wobbles suggest a minor true; side-to-side play suggests loose cones or end caps. If you feel gritty hub rotation, plan a bearing service.
Capture what you did in your maintenance note. Write “Week X: chain 0.25%, pads 1.5 mm, 40 ml sealant per tire.” A 10-second note now saves guesswork before a big event.
Monthly Deep Service: 800–1200 km
After a month of gravel dust and rain, it’s worth doing a deeper reset. This reduces creaks, stabilizes shifting, and keeps braking consistent.
- Full drivetrain clean: Remove the rear wheel. Degrease the cassette with a brush, clean the derailleur pulleys, and wipe chainrings. If you hot-wax, this is a strip-and-wax moment; if you oil, deep clean before fresh lube.
- Brake health check: Inspect rotor thickness (usually minimum is 1.5 mm, check the rotor label). Look for blueing or glazing. If lever feel is inconsistent and you’ve had long descents, put “bleed soon” on your list.
- Headset and bottom bracket: Check for play by rocking the bike with the front brake on; movement at the headset means it needs adjustment or bearing service. Spin cranks to feel for roughness at the bottom bracket.
- Frame and cockpit inspection: Remove the seatpost, wipe grit, apply a thin layer of carbon assembly paste (carbon) or grease (alloy). Check for paint cracks around high-stress points (head tube junction, bottom bracket area) and for cable housing rub.
- Freehub and hub service: Pull the freehub if your brand allows tool-free removal and wipe old grease; apply fresh light oil to the pawls (unless your brand specifies grease). For sealed bearing hubs, check for wobble and noise and plan a bearing swap if needed.
Finish with a quiet test ride around the block, shifting under gentle load and braking hard a few times to confirm pad and rotor behavior.
Drivetrain Care: Chain, Cassette, Chainring
The drivetrain is your bike’s sound system. Silence means efficiency. Here’s how to keep it that way in gritty conditions.
- Choose the right lube for your climate: Dry, dusty routes reward waxy lubes (hot dip or high-quality drip wax). Wet climates still work with wax, but you’ll refresh more often. Traditional wet lubes last in rain but attract dust; apply lightly and wipe aggressively.
- Application method: Clean the chain thoroughly first. Apply a small drop to each roller while backpedaling, allow it to penetrate, and wipe the outer plates. Over-lubing is as noisy as under-lubing because sticky surfaces collect grit.
- Chain wear strategy: On expensive cassettes, replacing chains early is cheaper than replacing a cassette. Many gravel riders rotate two chains, cleaning one while the other is on the bike. Mark them “A” and “B.”
- Cassette and ring inspection: Look for hooked teeth or shark-fin shapes. If a fresh chain skips under power on a single cog after good alignment, that cog may be worn.
- Derailleur jockey wheels: Pop the chain off the lower pulley, spin each wheel. If they feel gritty or stuck, open the cage (per manufacturer instructions) and clean or replace the pulleys.
Pro tip: When your bike suddenly gets noisy mid-ride, stop and feel the chain with your fingers. If it leaves black smear and feels sticky, it needs a wipe and a small refresh. Carry a travel-sized lube in your bag.
Brakes That Bite: Pads, Rotors, and Fluid
Gravel routes switch from dust to wet to long descents in an hour. Brakes need predictable feel and plenty of pad meat. A little attention keeps them consistent.
- Pad material choices: Resin (organic) pads are quiet and have good initial bite but wear faster in grit and wet. Metallic pads last longer and handle heat, but can be noisier and may take a ride to bed in. Semi-metallic blends aim for a middle ground. Choose based on your terrain and noise tolerance.
- Pad thickness: Replace pads before the backing plate gets close. Many brands mark a wear line; if not, 1 mm of friction material per side is a sensible minimum.
- Rotor health: Measure thickness with calipers where possible. Lightly true minor wobbles with a rotor truing fork. If your lever pulses or you hear scraping once per revolution, you might have a bent rotor or a pad glaze spot. Light sanding and a re-bed can help.
- Bleed intervals: Heat cycles and micro-bubbles gradually soften lever feel. Many riders bleed once or twice a year, more often if you ride long mountain descents or if feel degrades. Use the fluid specified by your brand (mineral oil or DOT are not interchangeable).
- Alignment and bed-in: After pad or rotor changes, re-center the caliper and perform a bed-in: accelerate to 20–25 km/h, then brake hard to walking speed 8–10 times to transfer an even film to the rotor.
Remember to check brake bolts with a torque wrench now and then. Lightweight hardware plus vibration can loosen over time.
Wheels, Hubs, and Tubeless Tires
Most gravel riders run tubeless for the lower pressures and puncture forgiveness. That system needs occasional attention but pays off in comfort and grip.
- Sealant schedule: In hot, dry climates sealant can dry in 4–8 weeks; in milder weather it can last 2–4 months. Top up more often if you hear dried clumps. If your tire was full of thorns last month, refresh sooner.
- Pressure habits: Record a baseline pressure for your main route and conditions. Then adjust by 1–2 psi to taste. Lower pressure adds grip and comfort but risks rim strikes; inserts help if you ride rocky tracks hard.
- Rim tape and valves: Leaks near spoke holes usually mean aging tape. If you see sealant at spoke holes or around the valve, pull the tire, replace the tape with quality tubeless tape, and snug the valve locknut by hand.
- Field repairs: Carry a tubeless plug kit. For small punctures, insert a plug, trim excess, add a few pumps, and keep rolling. For big sidewall cuts, boot the tire with a folded bill or emergency patch and insert a tube to get home.
- Hub care: Dust plus river crossings can push past seals. If you feel play or hear a grind, service bearings. On cup-and-cone hubs, adjust preload; on cartridge bearing hubs, plan replacements when rough.
Spin the wheels in the stand and listen for scraping, clicking, or a rhythmic hiss. Each sound points to a specific issue: rotor rub, a damaged spoke nipple, or a small sealant leak, respectively.
Cockpit, Bearings, and Frame Integrity
Washboard roads transmit relentless vibration through the cockpit and into the frame. A quiet front end makes rough tracks feel smoother and keeps handling precise.
- Headset preload: With the front brake on, rock the bike. If you feel knocking, loosen the stem bolts, tighten the top cap a quarter-turn at a time, then re-torque the stem bolts evenly to spec.
- Bar, stem, and lever bolts: Confirm torque and evenness. If you rotate bars for comfort, re-check faceplate torque in a crisscross pattern. Levers should be tight enough not to slip in a crash but adjustable without a herculean effort.
- Seatpost and saddle: Remove the post monthly, wipe dust, and apply appropriate paste or grease. Check saddle rails and clamp hardware for slips or creaks. On long rides, a 2–3 mm saddle height drift can feel like a different bike.
- Bottom bracket and crank: Listen for ticking under load. Check crank bolt torque and chainring bolts. If noise persists after drivetrain cleaning, inspect bottom bracket bearings.
- Frame inspection: Look for scuffs that have worn through paint and for any hairline cracks near high-stress zones. Apply clear frame protectors to areas where bags or housing rub.
A small amount of assembly compound on clean contact points—bar/stem, seatpost, pedal threads—does a lot to reduce micro-movement that creates creaks.
Shifting Systems: Mechanical and Electronic
Gravel shifts should be precise across dust, washboard, and load changes. The recipe is fresh housing or clean wires, precise limit setup, and sensible cable routing—or firmware attention if you’re wireless.
- Mechanical basics: Replace gritty housing and frayed cables before a big event. When installing, route cables with the widest, smoothest arcs possible. Set high/low limits so the chain just avoids dropping off. Use the barrel adjuster to fine-tune index after a short test ride.
- B-screw and chain gap: On 1x drivetrains, correct upper pulley-to-cog distance keeps shifting crisp. Follow your derailleur’s setup guide for the proper gauge or a comparison photo.
- Clutch service: If your derailleur has a clutch, wipe the mechanism and follow the brand’s maintenance guidance to keep chain control strong over chattery terrain.
- Electronic etiquette: Keep batteries topped, carry a small backup if your system supports it, and only update firmware well before key rides—not the night before—so you have time to validate behavior.
- Micro-adjust on the ride: Learn your system’s micro-adjust steps. A quarter-turn on a barrel adjuster or a couple of taps on an electronic trim can stop a noisy gear in seconds.
After big rain rides, a drop of lubricant at cable entry points and around derailleur pivots helps purge water and restore smooth actuation.
Trailside Fix Kit and Field Repairs
Gravel routes can strand you far from pavement. A tiny, well-chosen kit fixes most ride-stoppers fast.
- Core tools: Compact multi-tool with 2–8 mm hex and T25 Torx, a master link tool or pliers, and a tiny torque indicator if you like being exact with stems and seatposts.
- Flat fixes: Tubeless plugs, CO2 or a mini pump, one spare tube big enough for your tire volume, a small tire boot, and a valve core tool.
- Drivetrain save: One master link that matches your speed (10/11/12). If your chain snaps, remove the broken section and rejoin; you’ll still finish the ride.
- Misc. spares: Derailleur hanger, a few zip ties, a short length of duct tape wrapped around a pump, and a small section of cable housing.
- Field repairs: Practice plugging a tire at home and rehearse chain joining so you’re calm when it counts. For a bent rotor rubbing hard, gently tweak with an adjustable wrench or proper truing fork enough to spin home.
Organize the kit into a saddle bag or frame bag so it’s always on the bike. The best tool is the one you didn’t leave on the workbench.
Seasonal Overhaul and Storage Plan
Seasons change dirt texture, water exposure, and daylight. Align deeper maintenance with those shifts so your bike feels fresh just when you want to ride more.
- Spring reset: Full drivetrain strip and clean, new chain if borderline, fresh sealant in both tires, headset bearing check, and a careful look over brake pads and rotors after winter muck.
- Summer dust control: Prioritize chain cleanliness, frequent light lube or wax refresh, and weekly air checks as heat changes pressure. Check tire sidewalls for sun cracking in very hot regions.
- Autumn rain readiness: Swap to pads that handle wet better if needed, refresh sealant, and examine rim tape to prevent slow, mysterious leaks that show up in cold, wet rides.
- Winter storage: Clean and dry the bike top to bottom. Store with slightly higher tire pressure to discourage bead burps in the cold and keep the chain coated with your chosen protectant. If hanging, support the bike so brake levers don’t rest upside down for months (which can shift any tiny bubbles in hydraulic systems).
If you pause riding for weeks, do a short parking-lot shakedown once a month: a few hard stops, a few shifts, and a pressure check. It keeps seals wet and problems visible before spring.
Common Mistakes and Better Habits
Most gravel bike complaints trace back to a few repeated missteps. Swap them for smarter habits and the rest of this checklist gets easier.
- Over-washing with high pressure: High-pressure jets penetrate seals. Use low pressure and brushes, and your bearings will last.
- Over-lubing the chain: Thick, sticky chains sling grime all over the drivetrain and run noisy. Clean first, apply minimally, wipe thoroughly.
- Ignoring small noises: A faint creak on washboard is an invitation to find a loose bolt now, not a broken part later.
- Updating electronic shifting the day before a big ride: Give yourself time to test. Update the week before, then do a medium ride with plenty of shifts.
- Skipping notes: Relying on memory for sealant dates or last bleed is hard. A simple phone note avoids guesswork.
Better habits compound: consistency beats intensity. Ten minutes each week prevents hours of frustration later.
Your Personal Torque Map
A quick way to avoid over- or under-tightening is to make a “torque map” once and reuse it all year. It’s simply a list of the fasteners you touch most often and their torque values, plus any thread prep notes (dry, grease, threadlocker, or assembly paste). Here’s a template to copy into your phone:
- Stem faceplate: 4–6 Nm, tighten in a cross pattern; assembly paste on bar clamp if carbon
- Steerer clamp (stem): 5–6 Nm; confirm headset preload first
- Seatpost collar: 4–6 Nm; assembly paste for carbon posts
- Brake caliper bolts: 6–8 Nm; small amount of medium threadlocker if manufacturer recommends
- Rotor lockring/bolts: 40 Nm for centerlock lockrings; 6-bolt rotors typically 6 Nm with threadlocker per brand guidance
- Crank fixing bolt: Follow brand spec exactly; can vary widely
- Derailleur mounting bolt: Typically 8–10 Nm; check your model’s spec
Snap a photo of each area and annotate torque right on the image. When you work fast before a ride, you won’t overdo it.
Putting It All Together
Set three reminders in your calendar right now: one for the 60-second pre-ride check before every ride, one for a Sunday 10-minute weekly tidy, and one for a monthly deep service. Keep a tiny kit on the bike, record sealant and chain dates, and give brakes and bearings a moment of attention when the ride demands it.
The payoff shows up in silence on washboard, crisp shifts under load, and predictable braking in dust and rain. That quiet competence is what makes long gravel days feel effortless. When you want more route ideas and technique refreshers, browse the cycling resources at AllFreeSports—then go ride the plan you just built.