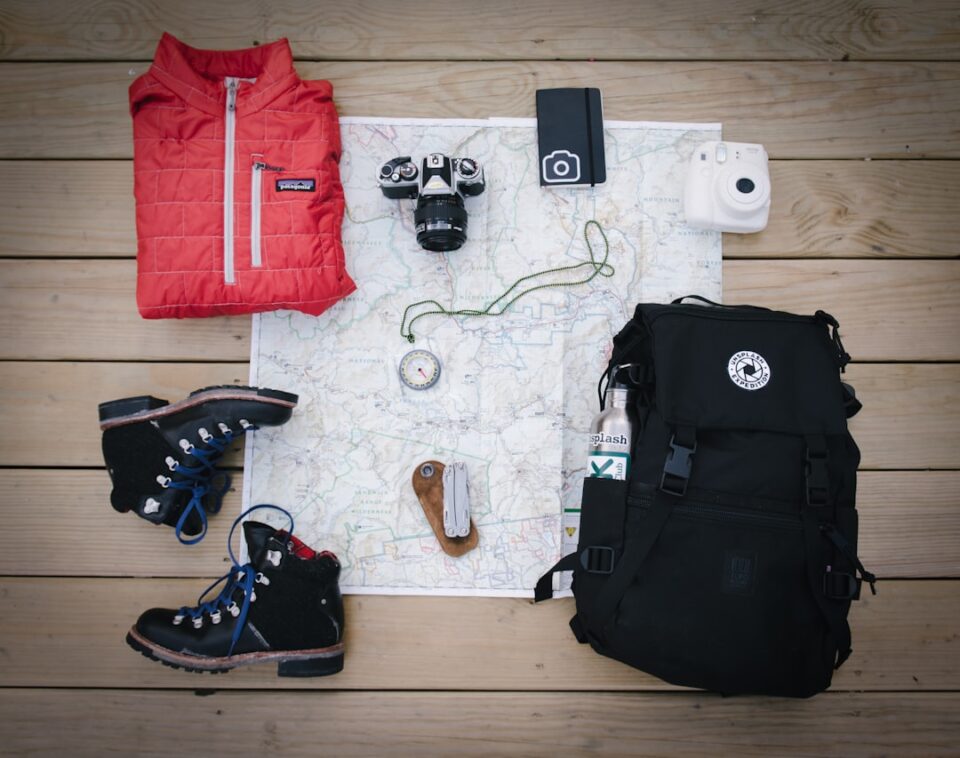
The ultimate bikepacking gear checklist for multi-day rides
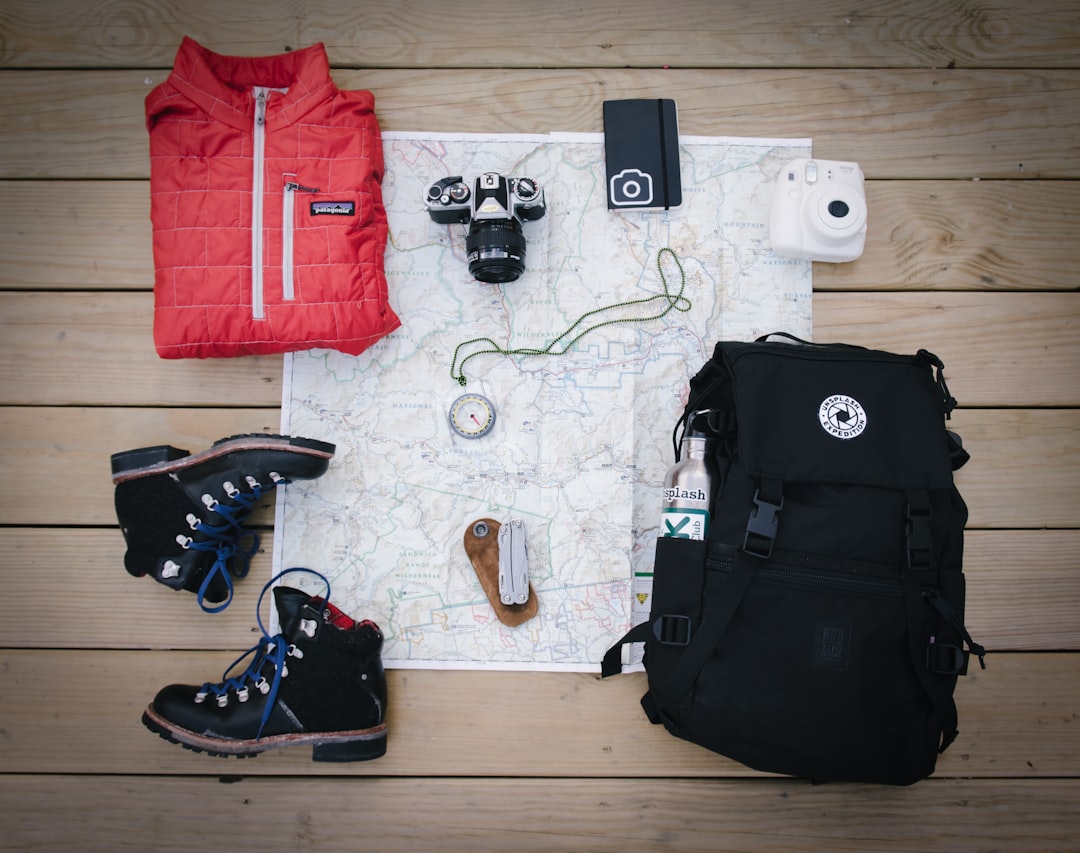
If you are planning your first overnight on two wheels or refining your system for a longer tour, a clear bikepacking gear checklist keeps the trip simple, efficient, and enjoyable. This guide goes far beyond a bullet list. It explains what each item does, when you truly need it, how items interact in the real world, and how to pack so the bike rides well on rough surfaces. You will also find comparison factors, checklists you can copy, and maintenance routines to help your gear last.
bikepacking gear checklist
Use this master checklist as a starting point, then tailor it to your terrain, weather, and trip length. Pack light but not fragile, and keep redundancy where it matters most.
- Bike and luggage: bike appropriate for route, frame bag, seat pack or saddle bag, handlebar roll or front harness, top tube bag, fork cages (optional), lightweight dry sacks, cargo straps or Voile straps.
- Sleep system: tent or bivy or hammock with tarp, groundsheet or footprint, sleeping pad, insulated quilt or sleeping bag, pillowcase or stuff sack pillow.
- Clothing system: riding layers (jersey or shirt, shorts or bibs), insulation (synthetic midlayer or light down), shell (breathable rain jacket, rain pants as needed), warm accessories (hat, buff, gloves), socks, off-bike camp wear (base layer, camp socks, light shorts or pants).
- Footwear: clipless shoes or flat-pedal shoes, camp sandals or light shoes.
- Food and water: water bottles or bladder, water filter or safe fill strategy, stove and pot (trip dependent), long-handled spoon, lighter, compact mug, fuel (if using stove), food plan by day.
- Navigation and electronics: GPS computer or smartphone with offline maps, paper map backup, headlamp and bike lights, battery bank, cables, small wall charger.
- Tools and spares: multi-tool with chain breaker, tire levers, tubeless repair kit and plugs, two tubes even if tubeless, patch kit, compact pump, spare chain link, short length of chain, brake pads, spare bolts, small bottle of lube, rag, zip ties, tape.
- Health and care: compact first-aid kit, sunscreen, lip balm, chamois cream or friction-reducing balm, toothbrush and tiny toothpaste, wet wipes or small pack towel, hand sanitizer.
- Admin and safety: ID, payment card, cash, permits if required, small knife, whistle, small cordage, emergency blanket, simple note and pencil.
As you dial in your approach, mark items you used daily, items you used once, and items that returned untouched. That ongoing log becomes your personal system.
Trip planning that shapes the list
Good planning trims weight before you even touch the scale. Start by defining the route surface mix, distance per day, resupply options, water access, elevation gain, and time window. Those six details control almost everything you carry. A remote desert route with no services for 150 kilometers calls for large water capacity and a sun-focused clothing system. A forested route with frequent springs and afternoon storms suggests smaller water volume but more weather protection and a pack towel that dries quickly.
Build your plan around a realistic daily timeline. Many riders average between 10 and 14 kilometers per hour overall on mixed surfaces with luggage. Add time for photos, snack stops, water collection, and navigation. If you know you will reach camp just before dusk, pack a headlamp in a pocket instead of the bottom of a bag. If your route crosses towns, note opening hours for shops and bakeries, and plan your morale-boosting hot meal accordingly.
Finally, write a simple route card: key junctions, bail-out options, water sources, and emergency phone numbers. Store a copy in your top tube bag and another in your phone. Share a version with a friend. If you want more background reading and fresh route ideas, browse the Cycling section on our site at allfreesports.com/cycling.
Bike choice and mechanical readiness
Any well-maintained bike can carry you into an overnight, but the right platform matches your route. On gravel roads and tame singletrack, a gravel bike with 40–47 mm tires balances speed and comfort. For rougher tracks, a hardtail mountain bike with 2.2–2.4 inch tires boosts control and reduces hand and foot fatigue. Touring frames excel with rack and pannier setups on paved or smooth dirt roads where aerodynamics matter less.
Whatever you ride, start with a pre-trip service. Inspect tires for cuts and sealant freshness, true the wheels, check brake pad thickness, clean and lube the drivetrain, verify torque on stem, bar, seatpost, racks, and cages, and confirm your headset turns smoothly without play. Replace cables or housing that binds. Swap worn derailleur pulleys or a stretched chain before the ride. A quiet bike feels faster, and it is easier to troubleshoot a new noise than a chorus of old ones.
Consider comfort details that pay back every hour: slightly wider tires at lower pressures, thicker bar tape or a top tube bag that supports your forearms on long straights, ergonomic grips on flat bars, or a saddle you have proven on long days. Make small changes one at a time and test them on a shakedown ride.
Luggage systems compared: racks, panniers, and bikepacking bags
The luggage system you choose determines how the bike handles and how quickly you can reach essentials. Three common approaches each have strengths. Choose based on terrain, capacity needs, and your frame’s mounting points.
- Bikepacking soft bags: The modern norm for mixed terrain. A large seat pack, handlebar roll, and frame bag keep weight centered and reduce sway. They shine on singletrack and narrow trails. They require more careful packing and can be less convenient for daily grocery stops.
- Racks and panniers: Classic and convenient, with quick access and high capacity. Panniers can add aerodynamic drag and are more prone to heel strike on tight trails. They excel on paved tours or quiet dirt roads. Front low-rider racks spread weight evenly for stable steering on smooth terrain.
- Mixed system: Many riders combine a small rear rack with a seat pack, or fork cages with a handlebar roll. This hybrid approach lets you fine tune weight distribution while maintaining trail-friendly handling.
Comparison factors to weigh include total capacity, bike clearance for heels and tires, how easily the system tightens down, robustness of buckles and straps, and how the bags behave when wet. Dry bags inside a harness provide modularity and are easy to remove at camp. Frame bags divide food, tools, and heavy items low and central. Top tube bags make snacks, sunscreen, and your phone accessible while rolling.
Sleep system: tent, bivy, or hammock
Your sleep system is a comfort multiplier. Pick the shelter and insulation that match your climate, expected wind, and bug pressure. Each option trades weight, space, and setup speed differently.
- Tent: Most versatile and comfortable across seasons. A lightweight two-wall tent shields you from wind and drizzle, manages condensation well, and offers bug protection. Freestanding models pitch quickly on rocky ground. Non-freestanding options save grams but need good stakes and soil.
- Bivy with tarp: Minimal and compact. A water-resistant bivy sack under a small tarp feels open to the stars and packs tiny. It requires careful site selection and good weather judgment. Condensation management is the skill to learn here.
- Hammock with tarp: Ideal where trees are abundant. Hammocks remove rocks and roots from the equation and can be very comfortable with the right underquilt and suspension. Learn the pitch angles at home first.
Pair your shelter with an insulated sleeping pad appropriate to the nighttime temperatures and an insulated quilt or sleeping bag that fits your build and sleep style. Many riders favor quilts for their packability and easy venting. A small pillow elevates rest for a tiny weight cost. Always keep your sleep system in a dry bag inside the seat pack or handlebar roll so it stays dry in sustained rain.
Clothing layers for variable weather
A smart clothing system is less about brand and more about function. Think in layers that you can combine or remove without stopping for long. Deploy materials that dry quickly and move moisture away from your skin.
- Base: Lightweight synthetic or merino top and cycling shorts or bibs. Bring a spare set of socks to keep feet comfortable at camp and the next morning.
- Insulation: A synthetic midlayer or light down jacket for cool evenings and early starts. Synthetic insulation keeps working when damp and is a good default for uncertain weather.
- Shell: A breathable rain jacket with a cycling-friendly cut and a small hood. In wetter regions, add rain pants or a rain kilt. A compact wind vest is useful in shoulder seasons and on long descents.
- Accessories: Thin gloves, a buff, and a warm hat compress to nothing but add a wide comfort range. Sunglasses protect your eyes from grit and bright skies.
Pack camp wear that feels good after a long day: a light base layer top, shorts or tights, and dry socks. Sleep in clean layers so your sleeping bag or quilt stays fresh longer. In sun-exposed regions, long sleeves and a light sun hoody can reduce the chance of sunburn while keeping you cooler than constant sunscreen applications.
Food, water, and simple cooking
Food planning is part fuel, part morale. You need meals that pack small, hold up to jostling, and taste good when you are tired. Break the plan into three buckets: ride snacks, main meals, and hot drink rituals if you enjoy them. Snacks might be tortillas with nut butter, bars, nuts, dried fruit, or salted chips for electrolytes. Main meals can be cold-soak couscous or instant rice with tuna and olive oil, or hot meals if you bring a stove.
If you choose to cook, a small canister stove and 750–900 ml pot cover coffee and simple dinners. A long-handled spoon is enough for stirring and eating. Keep fuel, stove, and lighter bundled in a small bag. Many riders skip cooking on short trips and rely on bakeries, diners, and cold food to reduce complexity. Decide by route and personal preference.
Water is the heaviest item you carry, so shape your storage to the source spacing. Bottles in the triangle are easy to reach and keep the load low. Add a frame bladder for long dry stretches. A compact filter, a squeeze bag, or purification tablets handle most natural sources. Know your region and use the method that fits it. Plan storage for 3–6 liters on remote legs and less where taps and stores are frequent. Mark reliable water on your route card to avoid guesswork late in the day.
Tools, spares, and on-trail fixes
Flat tires, loose fasteners, and worn pads are common issues on long rides. Pack tools that fix the most likely problems and keep them accessible, not buried. Practice each repair at home so the first time is not in a rain squall.
- Multi-tool with chain breaker: Ensure it fits your fasteners. Hex sizes 2–8 mm and T25 Torx cover most bikes. The chain breaker should be comfortable to hold and use.
- Pump and tire kit: A compact high-volume pump, tire levers, and a tubeless plug kit handle most punctures. Pack two tubes even if tubeless so you have a fallback. Add a small patch kit for tube repairs.
- Chain and brake spares: A quick link for your chain size, a short spare chain length, and a pair of brake pads. Pads wear faster with grit and long descents.
- Odds and ends: A small bottle of lube, a microfiber cloth, zip ties, electrical or fiber tape, a few spare bolts, and a tiny piece of emery cloth to clean pad glazing.
Organize tools in a dedicated roll or pouch and store heavy spares low in the frame bag. Build a small habit at lunch and camp: check for loose bolts, wipe grit from the chain, and inspect tires for thorns. Small routines keep minor issues from growing.
Navigation, lighting, and power
Modern navigation is reliable if you build redundancy. Download offline maps to your phone and to a dedicated bike GPS if you carry one. Bring a paper map segment with the overview and your route marked, folded inside a zip bag. Practice zooming in and out to keep context as you ride. Note that dense forests and deep canyons sometimes reduce satellite accuracy, so confirm with trail signs and terrain features when possible.
For lighting, carry a bright front light that doubles for road sections and night arrivals, and a small headlamp for camp. Rear blinkies boost visibility in traffic and tunnels. Power needs grow quickly with photos, navigation, and lights. A 10,000–20,000 mAh battery bank covers two to four days for most riders if you keep your phone on airplane mode while navigating. Pack short cables, label them with tape, and store them in a mesh pouch so they dry if they get damp.
If towns appear every day or two, plan café charging breaks. Seat near an outlet, order, ask politely, and keep cables tidy. Solar panels work on long high-sun routes but are less efficient in forests or short autumn days.
Safety, care, and considerate trail etiquette
Carry a small first-aid kit tailored to cycling: a few gauze pads, adhesive bandages, tape, antiseptic wipes, a few pain relievers, a small elastic wrap, and any personal medications. Add a whistle, an emergency blanket, and a short length of cordage. Store the kit where you can reach it quickly. Learn simple wound care and practice basic splinting with a spare tent stake and the elastic wrap.
Etiquette matters, especially on shared trails and farm roads. Yield predictably, say hello, and pass livestock calmly. Close gates after you. In wet conditions, ride through puddles instead of around them to protect trail edges. Pack out all trash, including food wrappers and used wipes. Use a trowel to dig a small cathole well away from water, and cover it fully. Lights on low settings in camp keep the night pleasant for others and preserve stars for you.
Wildlife encounters are rare and often memorable. Store food in odor-resistant bags and away from your sleep area where appropriate. In bear country, research current local advice on food storage methods and follow it. In hot regions, watch for heat stress and schedule cooling breaks in shade near water when possible.
Packing strategy and weight distribution
How you pack matters as much as what you pack. Aim for a low center of mass with balanced fore and aft weight. Heavy items such as water, tools, and food sit best in the frame bag or low on the fork. Light but bulky gear like your sleeping bag and pad live in the handlebar roll or seat pack. Keep daily-access items near the top or in a top tube bag so you are not unpacking every stop.
Create zones. Left side pocket: rain jacket and gloves. Right side pocket: snacks and sunscreen. Top tube bag: phone, route card, multi-tool, and lip balm. Frame bag front: pump and filter. Frame bag rear: food. Seat pack center: sleep system in a dry bag. Handlebar roll: shelter and extra layers. If your bike feels wobbly on descents, shift weight forward and lower. If your front end wanders on climbs, move water to the triangle or fork cages.
Use compression straps to keep bags tight. Roll dry bag closures tightly with a few full turns. Add a second strap around a handlebar roll so it cannot slip. After a few kilometers, stop and retighten everything. The first hour is when straps settle and small adjustments pay off for the rest of the day.
Training, pacing, and on-ride comfort
Fitness helps, but pacing and habits matter just as much. Two to four weeks before the trip, stack a few back-to-back rides at comfortable intensity, ideally on terrain similar to your route. Ride loaded at least twice so you feel how the bike handles and so you can adjust straps and hand positions. Learn your preferred cadence and use it to maintain steady effort on rolling ground.
During the ride, eat a little every 30–45 minutes and sip water often. Short, regular breaks keep your back and hands happy. Alternate hand positions and stand on climbs to change muscle loading. A thin friction-reducing balm on contact points may help reduce the chance of hot spots or chafing on long humid days. If something feels off, adjust immediately rather than hoping it will fade. Tiny fixes early keep you moving later.
Sleep is part of pacing. Aim to stop with enough light to set camp without rushing. Establish a simple evening routine: filter water, set shelter, change into dry camp layers, eat, stretch, and check the bike. Mornings tend to run smoother if you pack in the same order every day.
Maintenance checklist before and after trips
Reliable bikes make joyful trips. Use this pre- and post-ride routine to keep your setup running smoothly.
Before you roll
- Inspect tires for embedded debris and sidewall cuts. Replace if questionable.
- Refresh tubeless sealant and check bead seating.
- Spin wheels to confirm true and no rotor rub. Check spoke tension by feel.
- Measure chain wear with a gauge. Replace if beyond your threshold.
- Verify brake pad thickness and that pistons retract smoothly.
- Torque check on stem, bar, levers, saddle clamp, cages, racks, and crank bolts.
- Clean and lube chain. Wipe excess lube to avoid grit build-up.
- Pack a small test load and ride around the block. Listen for strap slap and fix it now.
After you return
- Wash the bike gently and dry it fully, paying attention to bearings and pivots.
- Inspect frame and bags for rub marks. Add frame tape to future contact points.
- Open every bag to air them out. Dry sleeping bag and pad fully before storage.
- Service the drivetrain with a full degrease and re-lube if the route was dusty or muddy.
- Log what you used and what you did not. Adjust your personal checklist while memories are fresh.
Budget picks and upgrade paths
Cost does not have to block adventures. Start with what you own, then add purpose-built pieces where they make the most difference. Dry bags and straps work with a handlebar harness you can make from foam and webbing. A basic frame bag and a used seat pack carry almost everything. Many riders find deals on lightly used bags, tents, and stoves, since people often experiment and resell.
When you upgrade, prioritize comfort and durability first. A high-quality sleeping pad, a proven saddle, or a well-cut rain jacket can add more ride happiness than shaving 100 grams. Next, target convenience: a frame bag with smart pockets, a handlebar roll with a quick-release system, or a top tube bag that does not hit your knees. Finally, consider weight savings. Lighter tents, quilts, and bags do feel nice, but only once your core fit and function are sorted.
Borrow gear to test when possible. Many local clubs host gear nights, and some shops rent lightweight shelters and bags. Each trial shortens the path to your personal setup.
Sample packing lists by trip length and season
These templates translate the big checklist into ready-to-pack lists. Adjust quantities by climate, altitude, and your comfort window.
Overnighter (1 night, mild weather)
- Luggage: frame bag, 8–12 L seat pack, small handlebar roll, top tube bag.
- Sleep: non-freestanding tent or bivy with tarp, 3-season quilt, inflatable pad.
- Clothing: riding kit, light insulation, wind or rain shell, thin gloves, buff, camp base layer and socks.
- Food and water: 2–3 liters water capacity, cold-soak dinner and breakfast, snacks, no stove or a tiny stove if you love coffee.
- Tools: multi-tool with chain breaker, pump, two tubes, tubeless plug kit, quick link, pads if your route has long descents.
- Nav and power: phone with offline maps, headlamp, 10,000 mAh battery.
Long weekend (2–3 nights, mixed weather)
- Luggage: add fork cages or a larger handlebar roll for food and layers.
- Sleep: lightweight two-wall tent, 3-season quilt, warmer pad.
- Clothing: add rain pants or a rain kilt, a thicker midlayer, and a dry camp shirt.
- Food and water: 3–5 liters capacity depending on route, compact stove and pot for hot meals, coffee kit if desired.
- Tools: add spare bolts and an extra tube, small lube bottle, tape, zip ties.
- Nav and power: bike light set, larger battery bank, short cable set and tiny wall charger.
Shoulder season or high country (cold nights)
- Sleep: warmer quilt or sleeping bag, higher R-value pad, full-coverage tent or robust tarp pitch options.
- Clothing: thicker gloves, wool hat, extra socks, heavier midlayer, vapor barrier liner socks for very cold mornings if you know how to use them.
- Food and water: more calories and hot drinks, fuel for longer boils at altitude, insulated bottle or cover to keep water from chilling.
- Bike: tires with good wet traction, fresh brake pads, and careful lube choice for drizzle.
For each template, conduct a shakedown ride with a loaded bike on familiar roads, then adjust straps, pad wraps, and item placement. Practice the camp setup at home and aim to pitch in ten minutes or less.
Your next ride, simplified
Bikepacking rewards preparation with freedom on the route. Use the bikepacking gear checklist as your base, trim or add for the landscape in front of you, and keep notes so your kit evolves with your experience. A well-packed bike is quiet, balanced, and ready to explore. The best system is the one you will happily use again next weekend.